> ## Documentation Index
> Fetch the complete documentation index at: https://wb-21fd5541-feature-automate-reference-docs-generation.mintlify.site/llms.txt
> Use this file to discover all available pages before exploring further.
# Dspy prompt optimization
これはインタラクティブなノートブックです。ローカルで実行するか、以下のリンクを使用できます:
* [Google Colabで開く](https://colab.research.google.com/github/wandb/weave/blob/master/docs/notebooks/dspy_prompt_optimization.ipynb)
* [GitHubでソースを表示](https://github.com/wandb/weave/blob/master/docs/notebooks/dspy_prompt_optimization.ipynb)
# DSPyとWeaveを使用したLLMワークフローの最適化
この [BIG-bench(Beyond the Imitation Game Benchmark)](https://github.com/google/BIG-bench) は、大規模言語モデルを検証し、その将来の能力を推定することを目的とした、200以上のタスクで構成される共同ベンチマークです。[BIG-Bench Hard(BBH)](https://github.com/suzgunmirac/BIG-Bench-Hard) は、現世代の言語モデルでは解決が非常に困難な、BIG-Benchの最も挑戦的な23のタスクのスイートです。
このチュートリアルでは、BIG-bench Hardベンチマークの **causal judgement task** で実装されたLLMワークフローのパフォーマンスを向上させ、プロンプト戦略を評価する方法を示します。[DSPy](https://dspy-docs.vercel.app/) LLMワークフローの実装とプロンプト戦略の最適化のために使用します。また [Weave](../../introduction.md) を使用してLLMワークフローを追跡し、プロンプト戦略を評価します。
## 依存関係のインストール
このチュートリアルでは以下のライブラリが必要です:
* [DSPy](https://dspy-docs.vercel.app/) LLMワークフローの構築と最適化のため。
* [Weave](../../introduction.md) LLMワークフローの追跡とプロンプト戦略の評価のため。
* [datasets](https://huggingface.co/docs/datasets/index) HuggingFace HubからBig-Bench Hardデータセットにアクセスするため。
```python
!pip install -qU dspy-ai weave datasets
```
LLMベンダーとして [OpenAI API](https://openai.com/index/openai-api/) を使用するため、OpenAI APIキーも必要になります。 [sign up](https://platform.openai.com/signup) からOpenAIプラットフォームで独自のAPIキーを取得できます。
```python
import os
from getpass import getpass
api_key = getpass("Enter you OpenAI API key: ")
os.environ["OPENAI_API_KEY"] = api_key
```
## Weaveを使用した追跡の有効化
WeaveはDSPyと現在統合されており、コードの先頭に [`weave.init`](../../reference/python-sdk/weave/index.md) を含めることで、Weave UIで探索できるDSPy関数を自動的にトレースできます。詳細については、[Weave integration docs for DSPy](../../guides/integrations/dspy.md) をご覧ください。
```python
import weave
weave.init(project_name="dspy-bigbench-hard")
```
このチュートリアルでは、 [`weave.Object`](../../guides/tracking/objects.md) から継承したメタデータクラスを使用してメタデータを管理します。
```python
class Metadata(weave.Object):
dataset_address: str = "maveriq/bigbenchhard"
big_bench_hard_task: str = "causal_judgement"
num_train_examples: int = 50
openai_model: str = "gpt-3.5-turbo"
openai_max_tokens: int = 2048
max_bootstrapped_demos: int = 8
max_labeled_demos: int = 8
metadata = Metadata()
```
**オブジェクトのバージョン管理**: `Metadata` オブジェクトは、それらを消費する関数がトレースされるとき、自動的にバージョン管理されトレースされます
## BIG-Bench Hardデータセットの読み込み
このデータセットをHuggingFace Hubから読み込み、トレーニングセットと検証セットに分割し、[publish](../../guides/core-types/datasets.md) でWeaveに公開します。これによりデータセットのバージョン管理が可能になり、[`weave.Evaluation`](../../guides/core-types/evaluations.md) を使用してプロンプト戦略を評価することもできます。
```python
import dspy
from datasets import load_dataset
@weave.op()
def get_dataset(metadata: Metadata):
# load the BIG-Bench Hard dataset corresponding to the task from Huggingface Hug
dataset = load_dataset(metadata.dataset_address, metadata.big_bench_hard_task)[
"train"
]
# create the training and validation datasets
rows = [{"question": data["input"], "answer": data["target"]} for data in dataset]
train_rows = rows[0 : metadata.num_train_examples]
val_rows = rows[metadata.num_train_examples :]
# create the training and validation examples consisting of `dspy.Example` objects
dspy_train_examples = [
dspy.Example(row).with_inputs("question") for row in train_rows
]
dspy_val_examples = [dspy.Example(row).with_inputs("question") for row in val_rows]
# publish the datasets to the Weave, this would let us version the data and use for evaluation
weave.publish(
weave.Dataset(
name=f"bigbenchhard_{metadata.big_bench_hard_task}_train", rows=train_rows
)
)
weave.publish(
weave.Dataset(
name=f"bigbenchhard_{metadata.big_bench_hard_task}_val", rows=val_rows
)
)
return dspy_train_examples, dspy_val_examples
dspy_train_examples, dspy_val_examples = get_dataset(metadata)
```
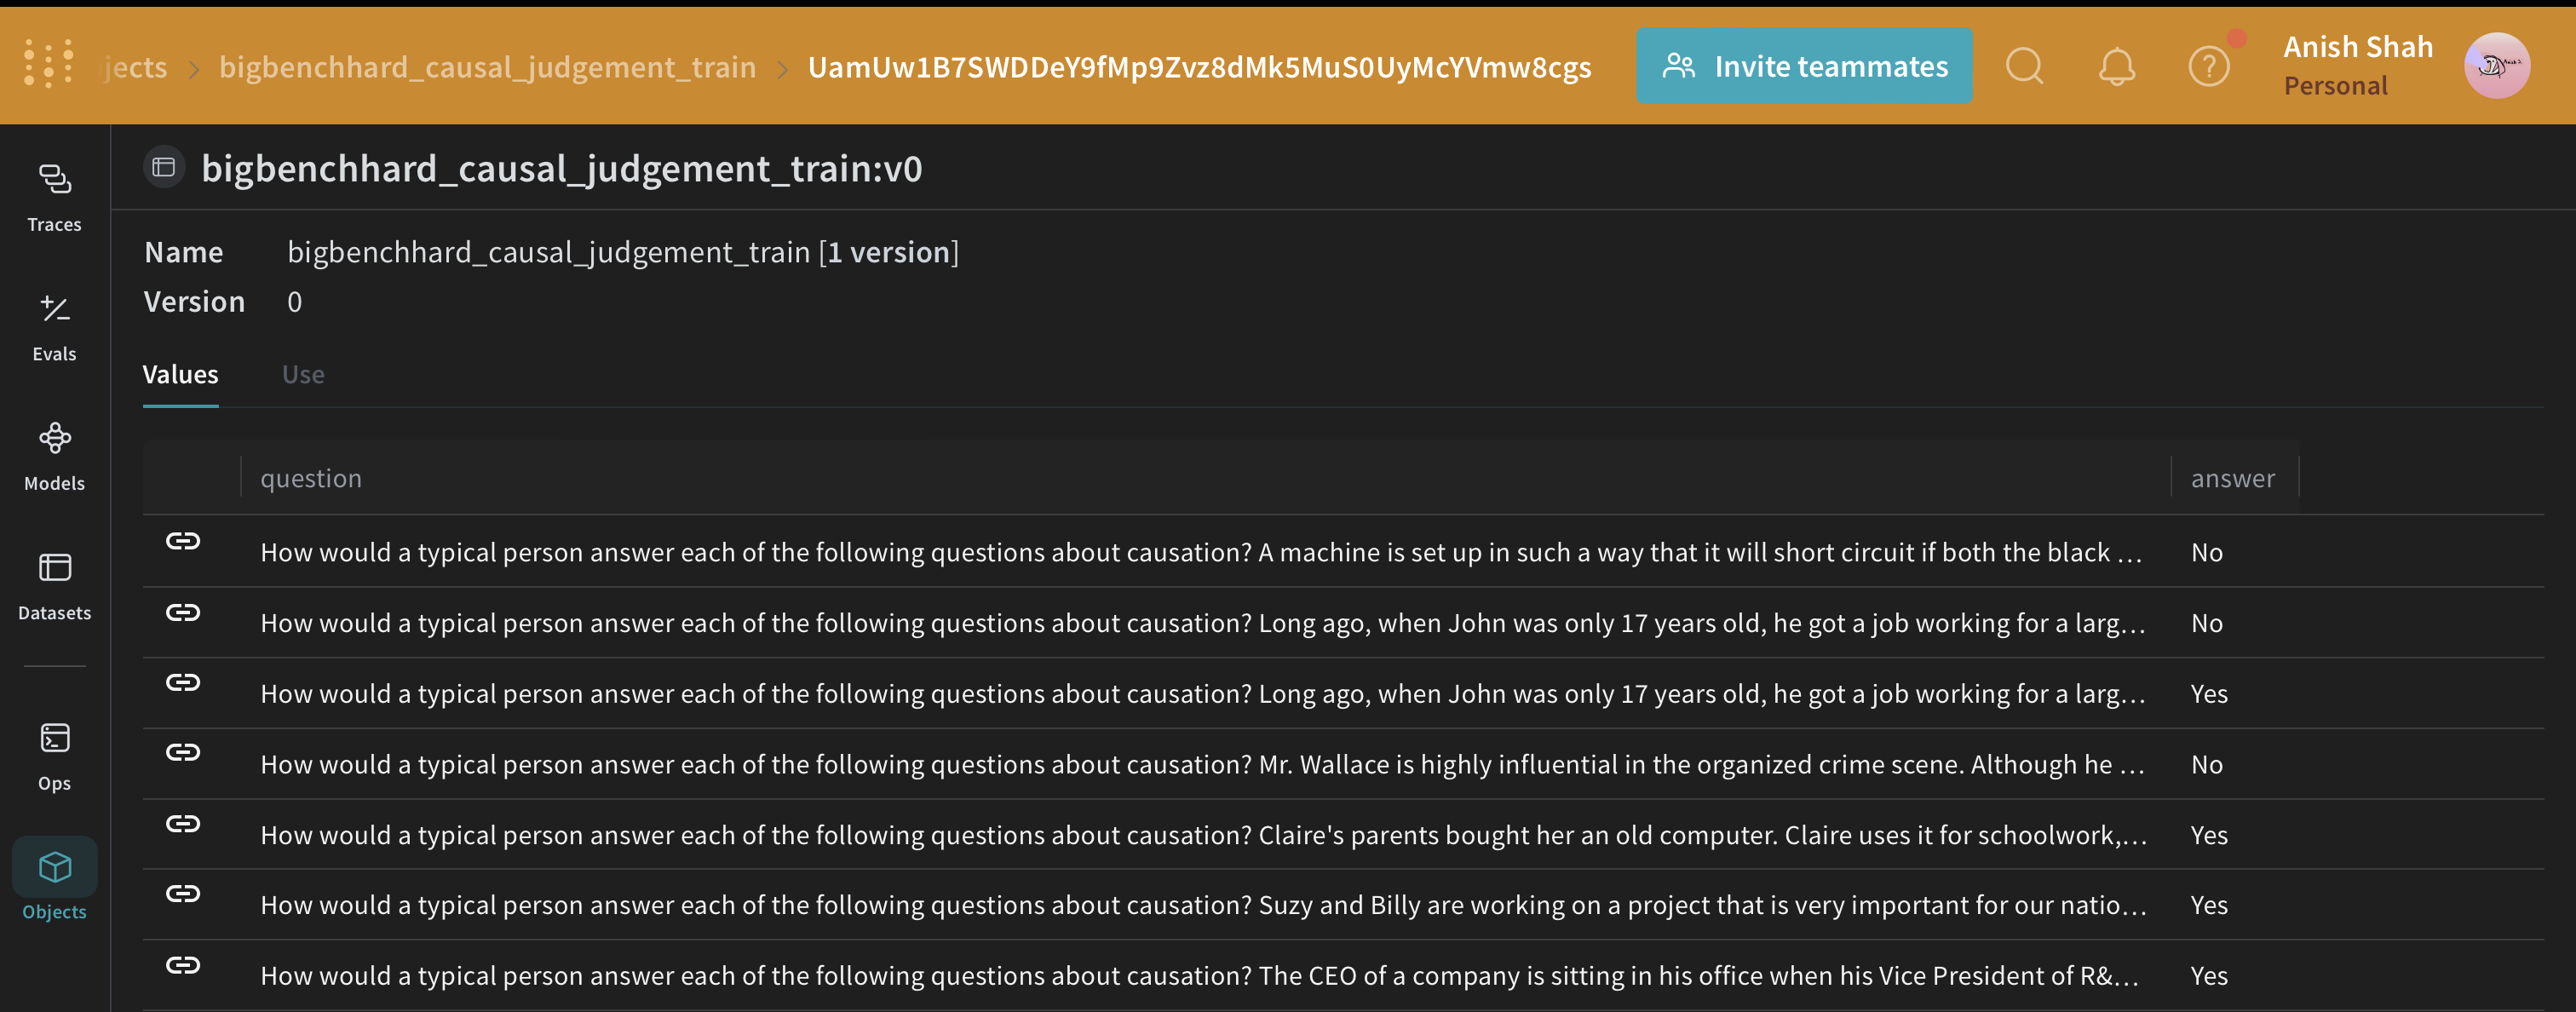
## DSPyプログラム
[DSPy](https://dspy-docs.vercel.app) は、自由形式の文字列を操作することから離れ、プログラミング(モジュラーな演算子を組み合わせてテキスト変換グラフを構築する)に近づけるフレームワークであり、コンパイラがプログラムから最適化されたLM呼び出し戦略とプロンプトを自動的に生成します。
私たちは [`dspy.OpenAI`](https://dspy-docs.vercel.app/api/language_model_clients/OpenAI) 抽象化を使用して [GPT3.5 Turbo](https://platform.openai.com/docs/models/gpt-3-5-turbo)へのLLM呼び出しを行います。
```python
system_prompt = """
You are an expert in the field of causal reasoning. You are to analyze the a given question carefully and answer in `Yes` or `No`.
You should also provide a detailed explanation justifying your answer.
"""
llm = dspy.OpenAI(model="gpt-3.5-turbo", system_prompt=system_prompt)
dspy.settings.configure(lm=llm)
```
### 因果推論シグネチャの作成
[signature](https://dspy-docs.vercel.app/docs/building-blocks/signatures) は [DSPy module](https://dspy-docs.vercel.app/docs/building-blocks/modules) の入出力動作の宣言的な仕様であり、これはタスク適応型コンポーネント(ニューラルネットワークの層に似ている)で、特定のテキスト変換を抽象化します。
```python
from pydantic import BaseModel, Field
class Input(BaseModel):
query: str = Field(description="The question to be answered")
class Output(BaseModel):
answer: str = Field(description="The answer for the question")
confidence: float = Field(
ge=0, le=1, description="The confidence score for the answer"
)
explanation: str = Field(description="The explanation for the answer")
class QuestionAnswerSignature(dspy.Signature):
input: Input = dspy.InputField()
output: Output = dspy.OutputField()
class CausalReasoningModule(dspy.Module):
def __init__(self):
self.prog = dspy.TypedPredictor(QuestionAnswerSignature)
@weave.op()
def forward(self, question) -> dict:
return self.prog(input=Input(query=question)).output.dict()
```
Big-Bench Hardの因果推論サブセットからの例で、LLMワークフロー(`CausalReasoningModule`)をテストしてみましょう。
```python
import rich
baseline_module = CausalReasoningModule()
prediction = baseline_module(dspy_train_examples[0]["question"])
rich.print(prediction)
```
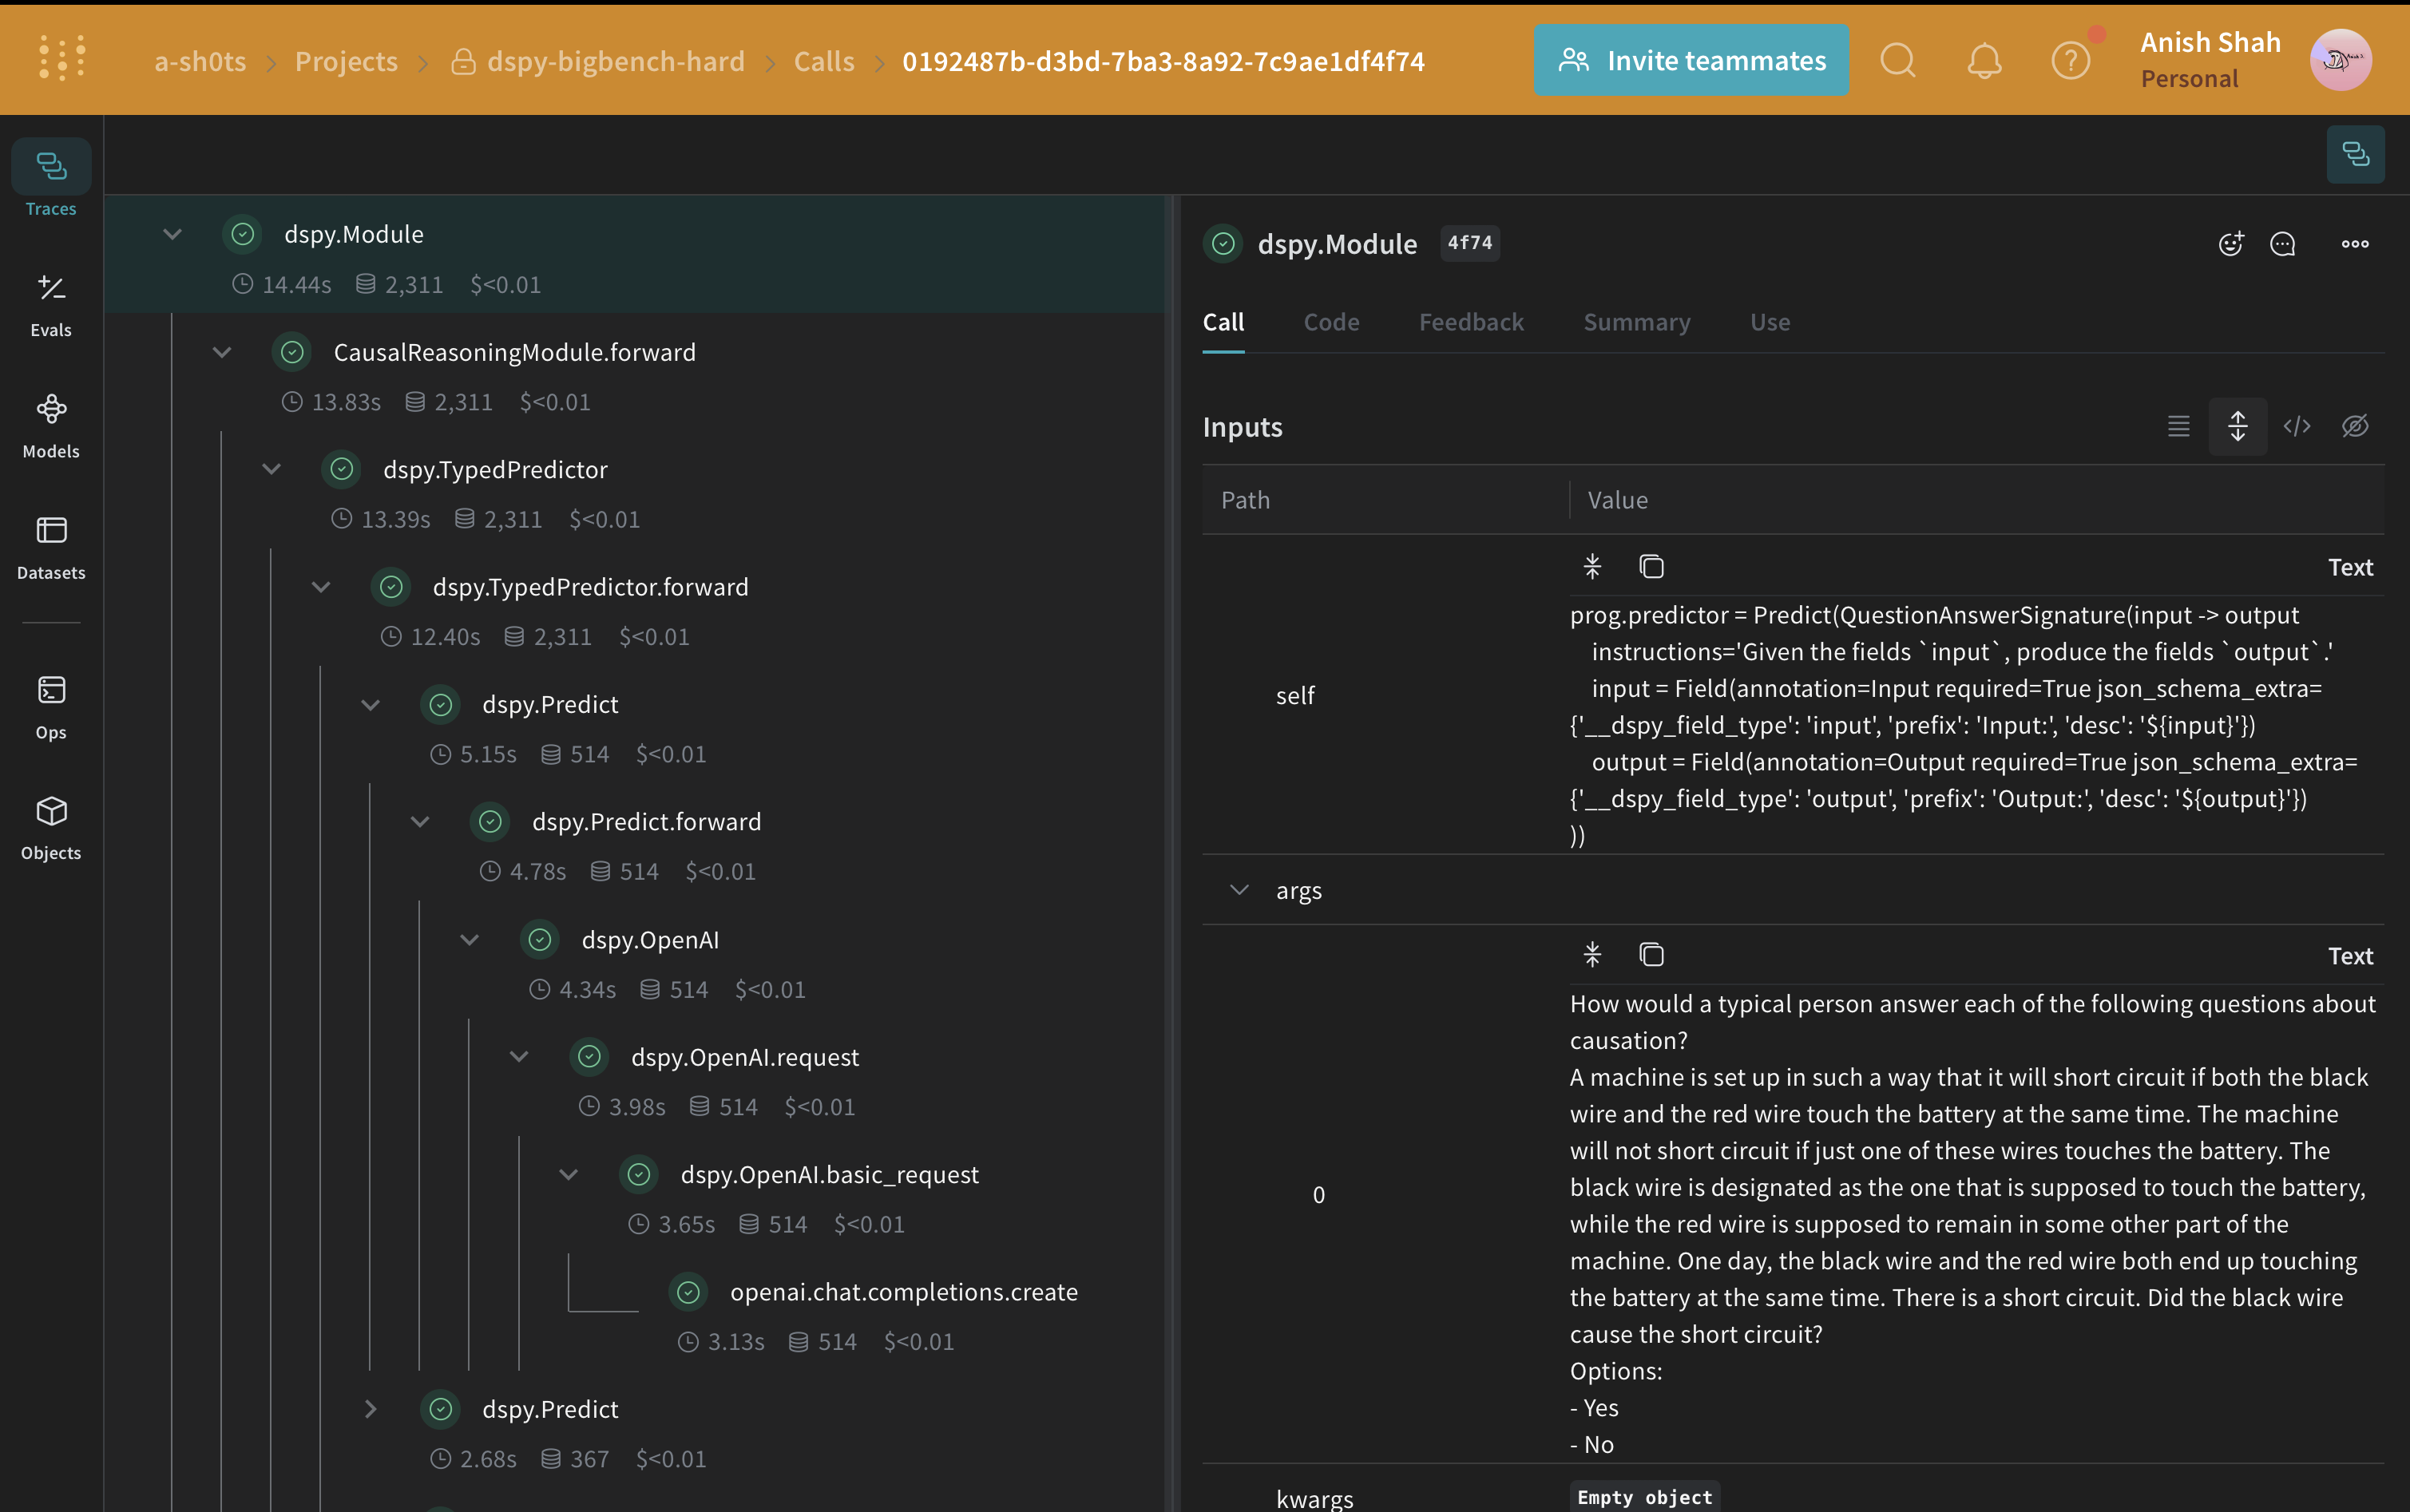
## DSPyプログラムの評価
ベースラインのプロンプト戦略ができたので、予測された回答と正解を照合する単純なメトリックを使用して、[`weave.Evaluation`](../../guides/core-types/evaluations.md) で検証セットで評価してみましょう。Weaveは各例を取り、アプリケーションを通過させ、複数のカスタムスコアリング関数で出力をスコアリングします。これにより、アプリケーションのパフォーマンスの概要と、個々の出力とスコアを詳しく調査するためのリッチなUIが得られます。
まず、ベースラインモジュールの出力からの回答が正解と同じかどうかを判断する単純なweave評価スコアリング関数を作成する必要があります。スコアリング関数には `model_output` キーワード引数が必要ですが、他の引数はユーザー定義であり、データセットの例から取得されます。引数名に基づいた辞書キーを使用して、必要なキーのみを取得します。
```python
@weave.op()
def weave_evaluation_scorer(answer: str, output: Output) -> dict:
return {"match": int(answer.lower() == output["answer"].lower())}
```
次に、評価を定義して実行するだけです。
```python
validation_dataset = weave.ref(
f"bigbenchhard_{metadata.big_bench_hard_task}_val:v0"
).get()
evaluation = weave.Evaluation(
name="baseline_causal_reasoning_module",
dataset=validation_dataset,
scorers=[weave_evaluation_scorer],
)
await evaluation.evaluate(baseline_module.forward)
```
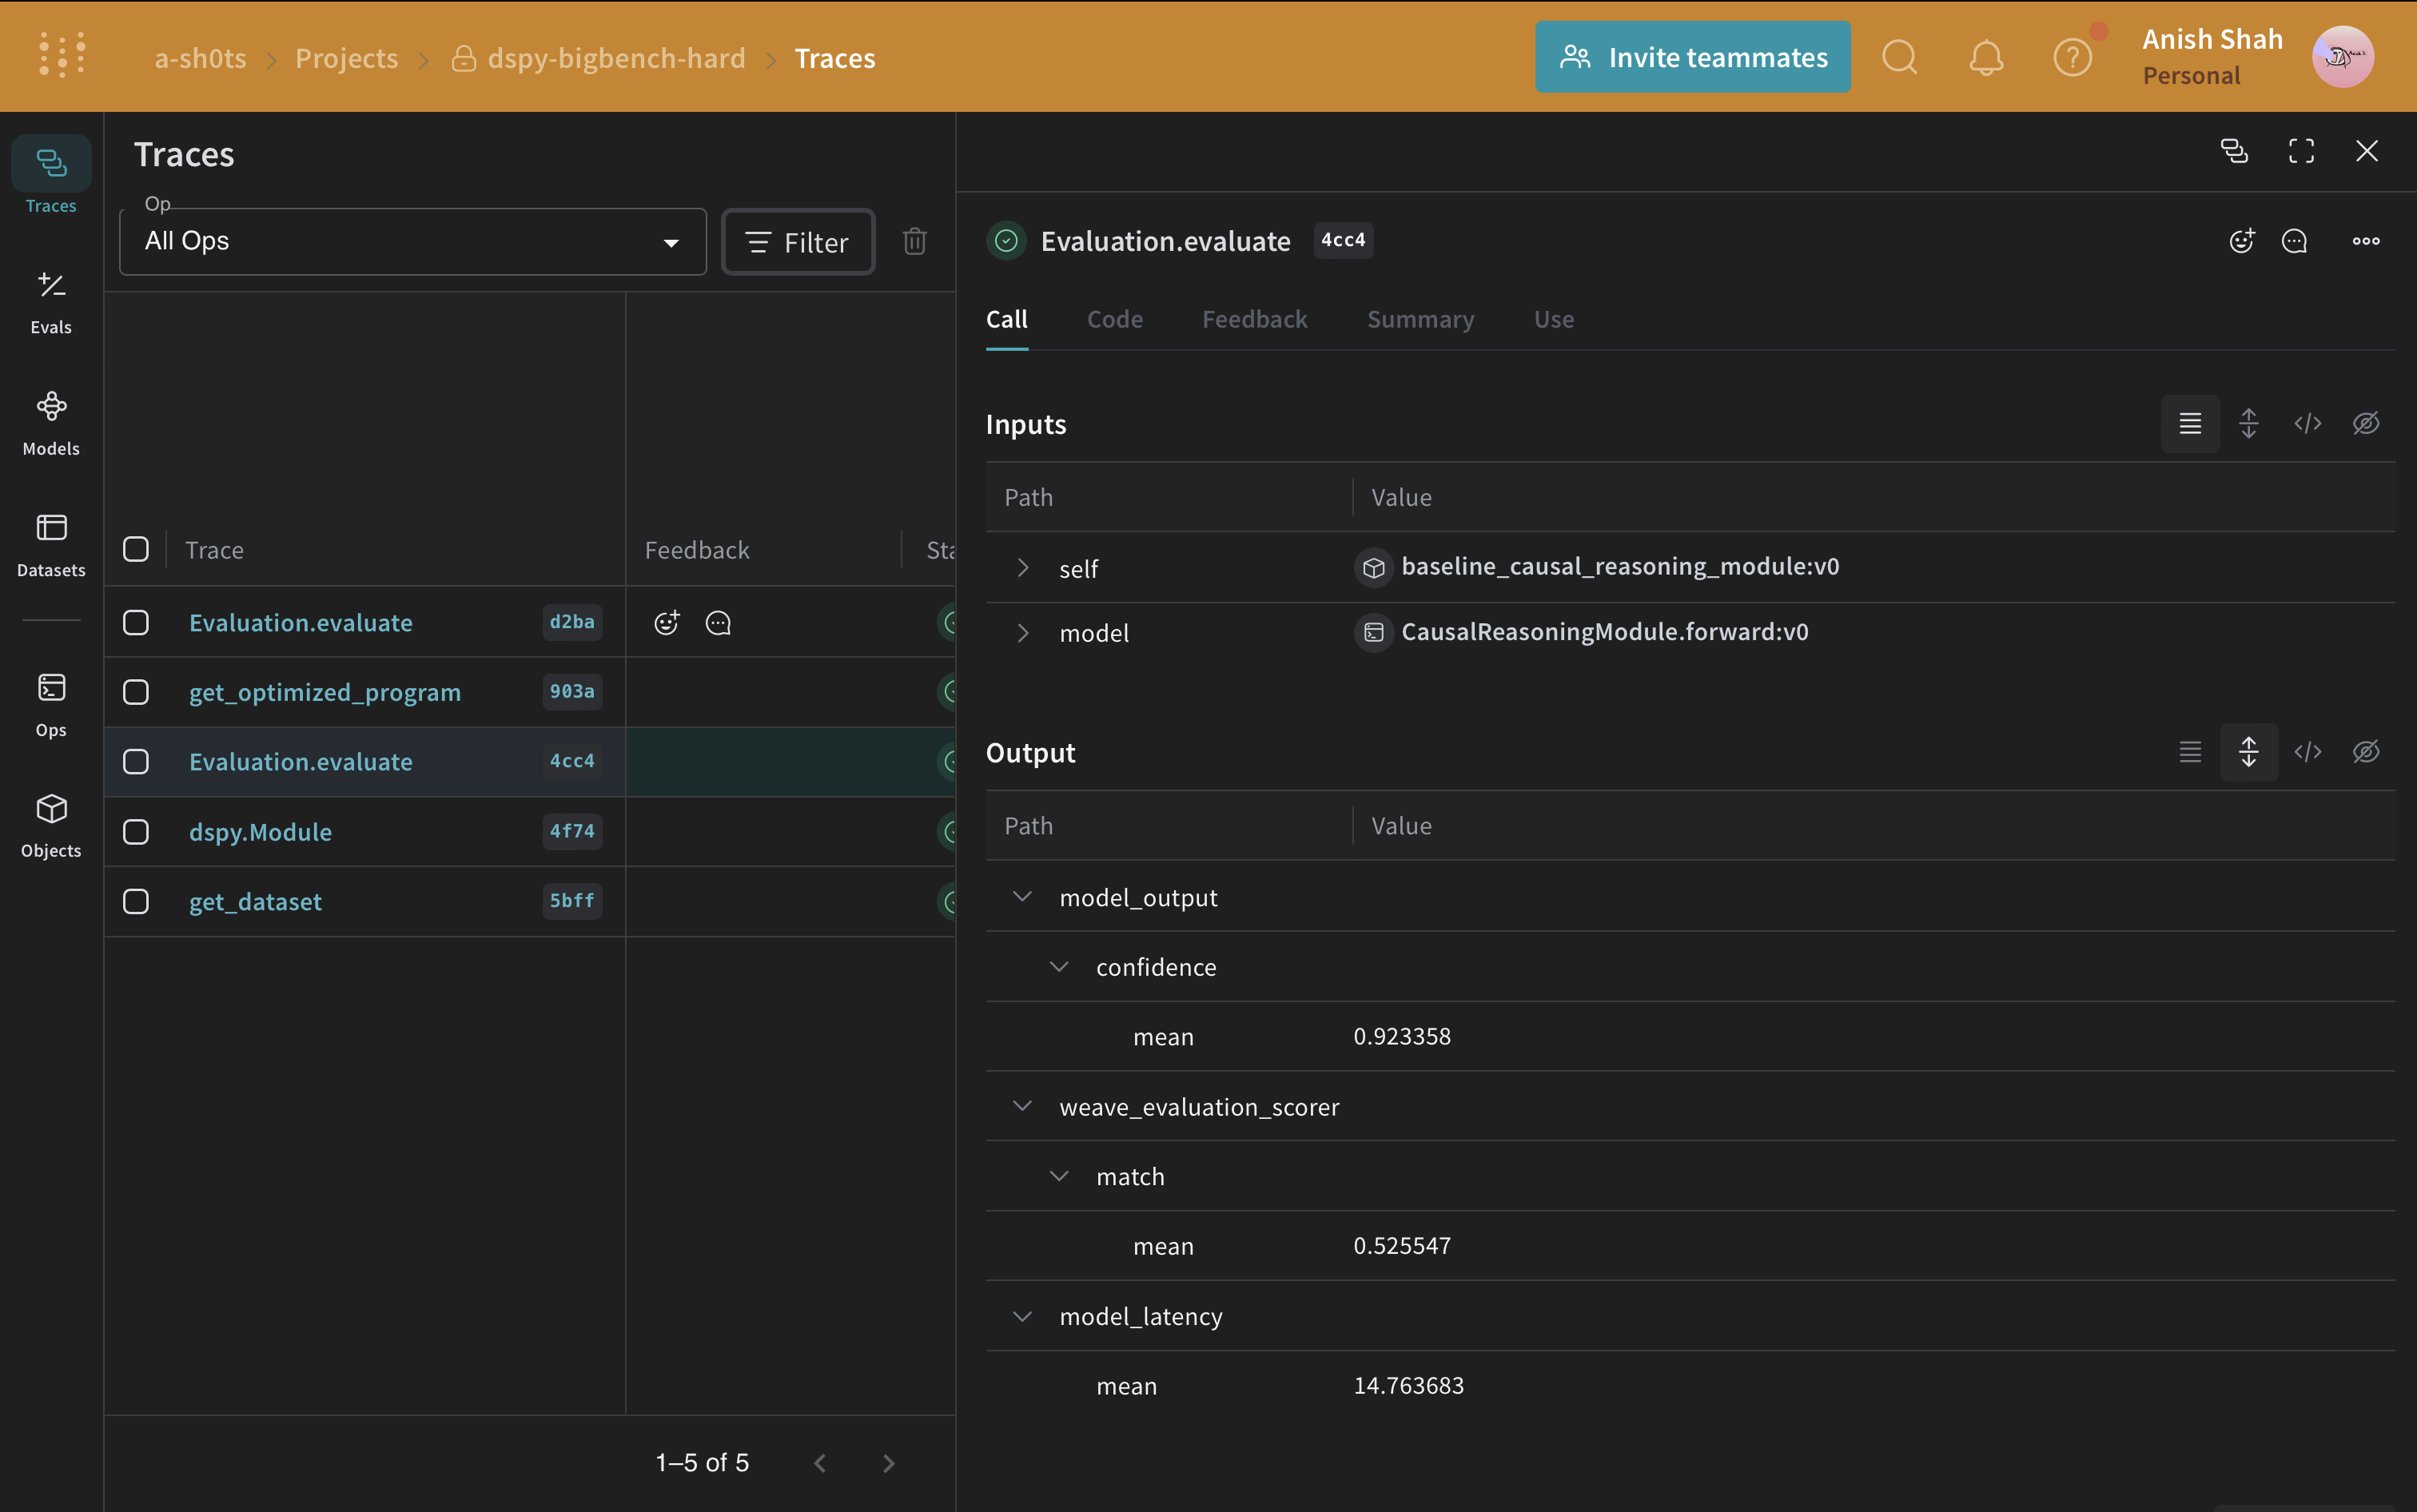
Pythonスクリプトから実行している場合は、以下のコードを使用して評価を実行できます:
```python
import asyncio
asyncio.run(evaluation.evaluate(baseline_module.forward))
```
因果推論データセットの評価を実行すると、OpenAIクレジットで約\$0.24かかります。
## DSPyプログラムの最適化
ベースラインのDSPyプログラムができたので、[DSPy teleprompter](https://dspy-docs.vercel.app/docs/building-blocks/optimizers) を使用して因果推論のパフォーマンスを向上させてみましょう。これは指定されたメトリックを最大化するためにDSPyプログラムのパラメータを調整できます。このチュートリアルでは、[BootstrapFewShot](https://dspy-docs.vercel.app/api/category/optimizers) テレプロンプターを使用します。
```python
from dspy.teleprompt import BootstrapFewShot
@weave.op()
def get_optimized_program(model: dspy.Module, metadata: Metadata) -> dspy.Module:
@weave.op()
def dspy_evaluation_metric(true, prediction, trace=None):
return prediction["answer"].lower() == true.answer.lower()
teleprompter = BootstrapFewShot(
metric=dspy_evaluation_metric,
max_bootstrapped_demos=metadata.max_bootstrapped_demos,
max_labeled_demos=metadata.max_labeled_demos,
)
return teleprompter.compile(model, trainset=dspy_train_examples)
optimized_module = get_optimized_program(baseline_module, metadata)
```
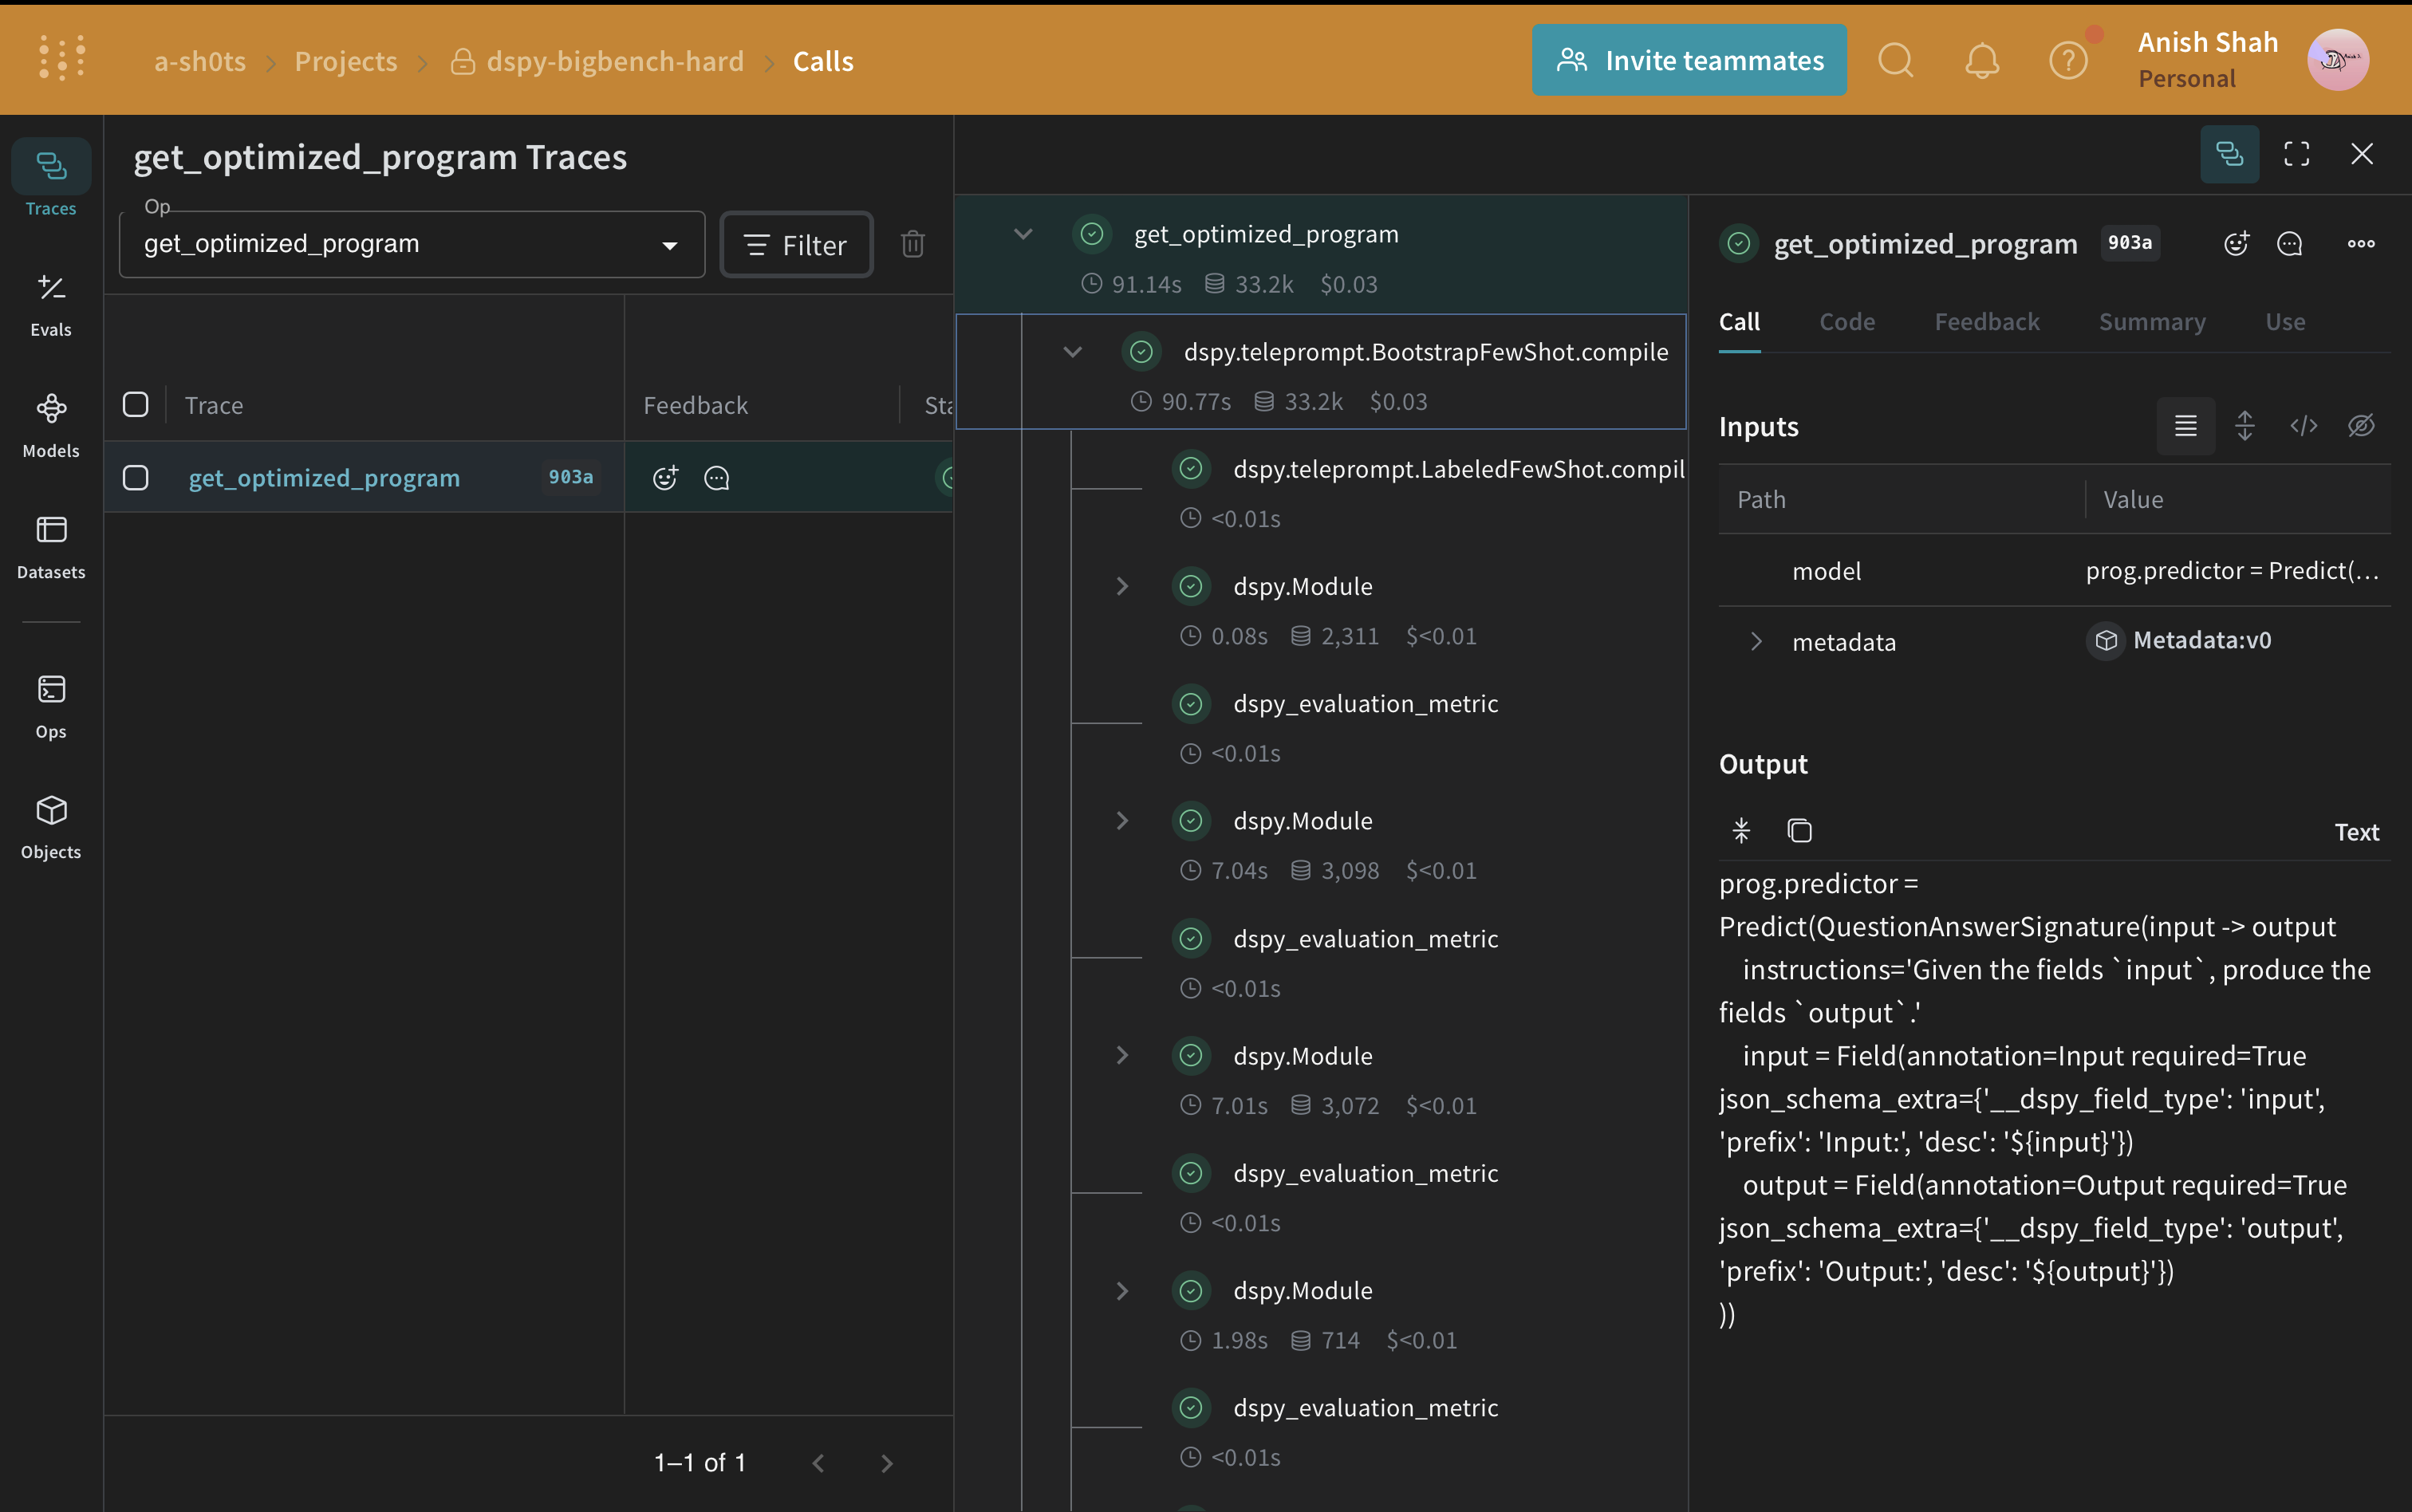
因果推論データセットの評価を実行すると、OpenAIクレジットで約\$0.04かかります。
最適化されたプログラム(最適化されたプロンプト戦略)ができたので、もう一度検証セットで評価し、ベースラインのDSPyプログラムと比較してみましょう。
```python
evaluation = weave.Evaluation(
name="optimized_causal_reasoning_module",
dataset=validation_dataset,
scorers=[weave_evaluation_scorer],
)
await evaluation.evaluate(optimized_module.forward)
```
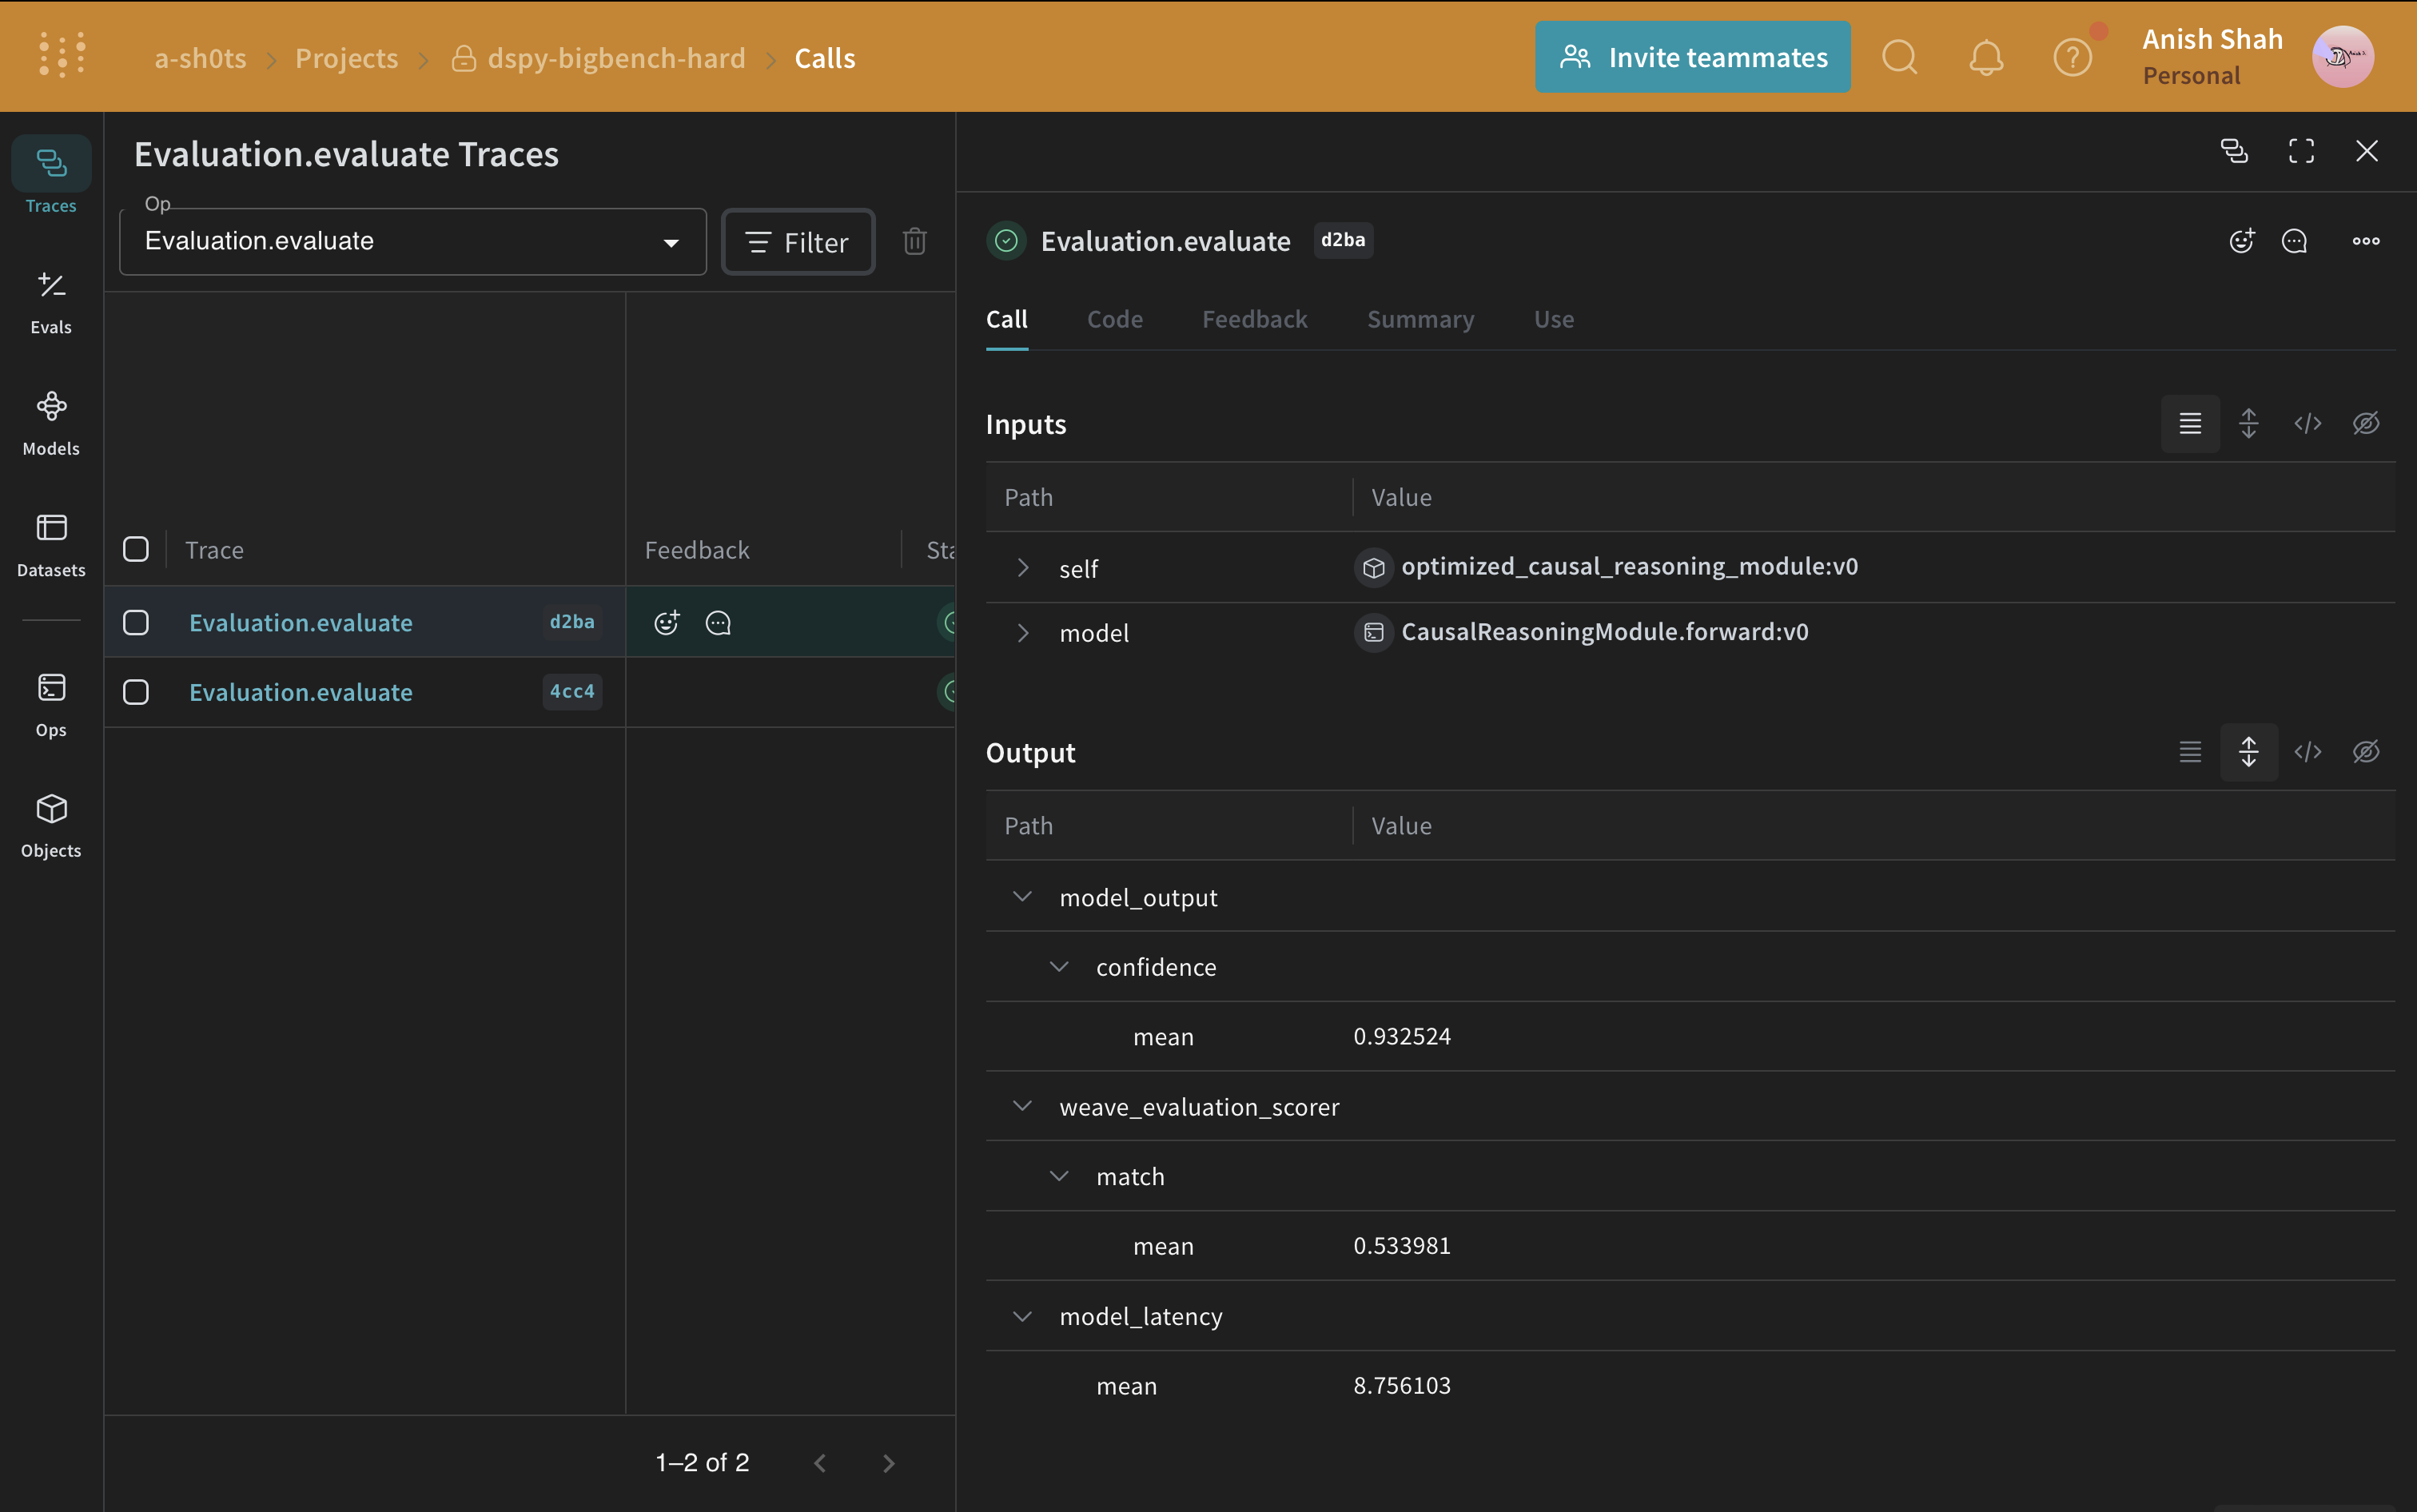
ベースラインプログラムと最適化されたプログラムの評価を比較すると、最適化されたプログラムは因果推論の質問に対してはるかに高い精度で回答していることがわかります。
## 結論
このチュートリアルでは、プロンプト最適化のためにDSPyを使用し、追跡と評価のためにWeaveを使用して、元のプログラムと最適化されたプログラムを比較する方法を学びました。