이것은 인터랙티브 노트북입니다. 로컬에서 실행하거나 아래 링크를 사용할 수 있습니다:

PII 데이터와 함께 Weave를 사용하는 방법

이 가이드에서는 개인 식별 정보(PII) 데이터를 비공개로 유지하면서 W&B Weave를 사용하는 방법을 배웁니다. 이 가이드는 PII 데이터를 식별, 수정 및 익명화하는 다음 방법을 보여줍니다:
  1. 정규 표현식을 사용하여 PII 데이터를 식별하고 수정합니다.
  2. Microsoft의 Presidio, 파이썬 기반 데이터 보호 SDK. 이 도구는 수정 및 대체 기능을 제공합니다.
  3. Faker, PII 데이터를 익명화하기 위해 Presidio와 결합된 가짜 데이터를 생성하는 Python 라이브러리.
또한 다음을 사용하는 방법을 배웁니다 weave.op 입력/출력 로깅 사용자 정의autopatch_settings PII 수정 및 익명화를 워크플로우에 통합합니다. 자세한 내용은 로깅된 입력 및 출력 사용자 정의를 참조하세요. 시작하려면 다음을 수행하세요:
  1. 다음을 검토하세요 개요 섹션.
  2. 다음을 완료하세요 전제 조건.
  3. 다음을 검토하세요 사용 가능한 방법 PII 데이터를 식별, 수정 및 익명화하기 위한.
  4. Weave 호출에 방법 적용.

개요

다음 섹션에서는 다음을 사용한 입력 및 출력 로깅에 대한 개요를 제공합니다 weave.op, 그리고 Weave에서 PII 데이터 작업에 대한 모범 사례.

다음을 사용하여 입력 및 출력 로깅 사용자 정의 weave.op

Weave Ops를 사용하면 입력 및 출력 후처리 함수를 정의할 수 있습니다. 이러한 함수를 사용하여 LLM 호출에 전달되거나 Weave에 로깅되는 데이터를 수정할 수 있습니다. 다음 예제에서는 두 개의 후처리 함수가 정의되어 다음에 인수로 전달됩니다 weave.op().
from dataclasses import dataclass
from typing import Any

import weave

# Inputs Wrapper Class
@dataclass
class CustomObject:
    x: int
    secret_password: str

# First we define functions for input and output postprocessing:
def postprocess_inputs(inputs: dict[str, Any]) -> dict[str, Any]:
    return {k:v for k,v in inputs.items() if k != "hide_me"}

def postprocess_output(output: CustomObject) -> CustomObject:
    return CustomObject(x=output.x, secret_password="REDACTED")

# Then, when we use the `@weave.op` decorator, we pass these processing functions as arguments to the decorator:
@weave.op(
    postprocess_inputs=postprocess_inputs,
    postprocess_output=postprocess_output,
)
def some_llm_call(a: int, hide_me: str) -> CustomObject:
    return CustomObject(x=a, secret_password=hide_me)

PII 데이터와 함께 Weave를 사용하기 위한 모범 사례

PII 데이터와 함께 Weave를 사용하기 전에 PII 데이터와 함께 Weave를 사용하기 위한 모범 사례를 검토하세요.

테스트 중

  • PII 감지를 확인하기 위해 익명화된 데이터 로깅
  • Weave Traces로 PII 처리 프로세스 추적
  • 실제 PII를 노출하지 않고 익명화 성능 측정

프로덕션 환경에서

  • 원시 PII를 절대 로깅하지 마세요
  • 로깅 전 민감한 필드 암호화

암호화 팁

  • 나중에 복호화해야 하는 데이터에는 가역적 암호화 사용
  • 역변환이 필요 없는 고유 ID에는 단방향 해싱 적용
  • 암호화된 상태로 분석해야 하는 데이터에는 특수 암호화 고려

전제 조건

  1. 먼저 필요한 패키지를 설치하세요.
%%capture
# @title required python packages:
!pip install cryptography
!pip install presidio_analyzer
!pip install presidio_anonymizer
!python -m spacy download en_core_web_lg    # Presidio uses spacy NLP engine
!pip install Faker                          # we'll use Faker to replace PII data with fake data
!pip install weave                          # To leverage Traces
!pip install set-env-colab-kaggle-dotenv -q # for env var
!pip install anthropic                      # to use sonnet
!pip install cryptography                   # to encrypt our data
  1. API 키를 설정하세요. 다음 링크에서 API 키를 찾을 수 있습니다.
%%capture
# @title Make sure to set up set up your API keys correctly
# See: https://pypi.org/project/set-env-colab-kaggle-dotenv/ for usage instructions.

from set_env import set_env

_ = set_env("ANTHROPIC_API_KEY")
_ = set_env("WANDB_API_KEY")
  1. Weave 프로젝트를 초기화하세요.
import weave

# Start a new Weave project
WEAVE_PROJECT = "pii_cookbook"
weave.init(WEAVE_PROJECT)
  1. 10개의 텍스트 블록이 포함된 데모 PII 데이터셋을 로드하세요.
import requests

url = "https://raw.githubusercontent.com/wandb/weave/master/docs/notebooks/10_pii_data.json"
response = requests.get(url)
pii_data = response.json()

print('PII data first sample: "' + pii_data[0]["text"] + '"')

수정 방법 개요

다음을 완료한 후 설정, 다음을 수행할 수 있습니다 PII 데이터를 감지하고 보호하기 위해 다음 방법을 사용하여 PII 데이터를 식별하고 수정하며 선택적으로 익명화합니다:
  1. 정규 표현식을 사용하여 PII 데이터를 식별하고 수정합니다.
  2. Microsoft Presidio, 수정 및 대체 기능을 제공하는 Python 기반 데이터 보호 SDK.
  3. Faker, 가짜 데이터를 생성하기 위한 Python 라이브러리.

방법 1: 정규 표현식을 사용한 필터링

정규 표현식(regex)은 PII 데이터를 식별하고 수정하는 가장 간단한 방법입니다. 정규 표현식을 사용하면 전화번호, 이메일 주소, 사회 보장 번호와 같은 다양한 형식의 민감한 정보와 일치하는 패턴을 정의할 수 있습니다. 정규 표현식을 사용하면 더 복잡한 NLP 기술 없이도 대량의 텍스트를 스캔하고 정보를 대체하거나 수정할 수 있습니다.
import re

# Define a function to clean PII data using regex
def redact_with_regex(text):
    # Phone number pattern
    # \b         : Word boundary
    # \d{3}      : Exactly 3 digits
    # [-.]?      : Optional hyphen or dot
    # \d{3}      : Another 3 digits
    # [-.]?      : Optional hyphen or dot
    # \d{4}      : Exactly 4 digits
    # \b         : Word boundary
    text = re.sub(r"\b\d{3}[-.]?\d{3}[-.]?\d{4}\b", "<PHONE>", text)

    # Email pattern
    # \b         : Word boundary
    # [A-Za-z0-9._%+-]+ : One or more characters that can be in an email username
    # @          : Literal @ symbol
    # [A-Za-z0-9.-]+ : One or more characters that can be in a domain name
    # \.         : Literal dot
    # [A-Z|a-z]{2,} : Two or more uppercase or lowercase letters (TLD)
    # \b         : Word boundary
    text = re.sub(
        r"\b[A-Za-z0-9._%+-]+@[A-Za-z0-9.-]+\.[A-Z|a-z]{2,}\b", "<EMAIL>", text
    )

    # SSN pattern
    # \b         : Word boundary
    # \d{3}      : Exactly 3 digits
    # -          : Literal hyphen
    # \d{2}      : Exactly 2 digits
    # -          : Literal hyphen
    # \d{4}      : Exactly 4 digits
    # \b         : Word boundary
    text = re.sub(r"\b\d{3}-\d{2}-\d{4}\b", "<SSN>", text)

    # Simple name pattern (this is not comprehensive)
    # \b         : Word boundary
    # [A-Z]      : One uppercase letter
    # [a-z]+     : One or more lowercase letters
    # \s         : One whitespace character
    # [A-Z]      : One uppercase letter
    # [a-z]+     : One or more lowercase letters
    # \b         : Word boundary
    text = re.sub(r"\b[A-Z][a-z]+ [A-Z][a-z]+\b", "<NAME>", text)

    return text
샘플 텍스트로 함수를 테스트해 보겠습니다:
# Test the function
test_text = "My name is John Doe, my email is john.doe@example.com, my phone is 123-456-7890, and my SSN is 123-45-6789."
cleaned_text = redact_with_regex(test_text)
print(f"Raw text:\n\t{test_text}")
print(f"Redacted text:\n\t{cleaned_text}")

방법 2: Microsoft Presidio를 사용한 수정

다음 방법은 다음을 사용하여 PII 데이터를 완전히 제거하는 것입니다 Microsoft Presidio. Presidio는 PII를 수정하고 PII 유형을 나타내는 자리 표시자로 대체합니다. 예를 들어, Presidio는 Alex 내의 "My name is Alex"<PERSON>로 대체합니다. Presidio는 일반적인 엔티티에 대한 내장 지원을 제공합니다. 아래 예제에서는 PHONE_NUMBER, PERSON, LOCATION, EMAIL_ADDRESS 또는 US_SSN인 모든 엔티티를 수정합니다. Presidio 프로세스는 함수로 캡슐화됩니다.
from presidio_analyzer import AnalyzerEngine
from presidio_anonymizer import AnonymizerEngine

# Set up the Analyzer, which loads an NLP module (spaCy model by default) and other PII recognizers.
analyzer = AnalyzerEngine()

# Set up the Anonymizer, which will use the analyzer results to anonymize the text.
anonymizer = AnonymizerEngine()

# Encapsulate the Presidio redaction process into a function
def redact_with_presidio(text):
    # Analyze the text to identify PII data
    results = analyzer.analyze(
        text=text,
        entities=["PHONE_NUMBER", "PERSON", "LOCATION", "EMAIL_ADDRESS", "US_SSN"],
        language="en",
    )
    # Anonymize the identified PII data
    anonymized_text = anonymizer.anonymize(text=text, analyzer_results=results)
    return anonymized_text.text
샘플 텍스트로 함수를 테스트해 보겠습니다:
text = "My phone number is 212-555-5555 and my name is alex"

# Test the function
anonymized_text = redact_with_presidio(text)

print(f"Raw text:\n\t{text}")
print(f"Redacted text:\n\t{anonymized_text}")

방법 3: Faker와 Presidio를 사용한 대체를 통한 익명화

텍스트를 수정하는 대신, MS Presidio를 사용하여 이름 및 전화번호와 같은 PII를 Faker Python 라이브러리를 사용하여 생성된 가짜 데이터로 교체하여 익명화할 수 있습니다. 예를 들어, 다음과 같은 데이터가 있다고 가정해 보세요: "My name is Raphael and I like to fish. My phone number is 212-555-5555" Presidio와 Faker를 사용하여 데이터가 처리되면 다음과 같이 보일 수 있습니다: "My name is Katherine Dixon and I like to fish. My phone number is 667.431.7379" Presidio와 Faker를 효과적으로 함께 사용하려면 사용자 정의 연산자에 대한 참조를 제공해야 합니다. 이러한 연산자는 Presidio를 PII를 가짜 데이터로 교체하는 Faker 함수로 안내합니다.
from faker import Faker
from presidio_anonymizer import AnonymizerEngine
from presidio_anonymizer.entities import OperatorConfig

fake = Faker()

# Create faker functions (note that it has to receive a value)
def fake_name(x):
    return fake.name()

def fake_number(x):
    return fake.phone_number()

# Create custom operator for the PERSON and PHONE_NUMBER" entities
operators = {
    "PERSON": OperatorConfig("custom", {"lambda": fake_name}),
    "PHONE_NUMBER": OperatorConfig("custom", {"lambda": fake_number}),
}

text_to_anonymize = (
    "My name is Raphael and I like to fish. My phone number is 212-555-5555"
)

# Analyzer output
analyzer_results = analyzer.analyze(
    text=text_to_anonymize, entities=["PHONE_NUMBER", "PERSON"], language="en"
)

anonymizer = AnonymizerEngine()

# do not forget to pass the operators from above to the anonymizer
anonymized_results = anonymizer.anonymize(
    text=text_to_anonymize, analyzer_results=analyzer_results, operators=operators
)

print(f"Raw text:\n\t{text_to_anonymize}")
print(f"Anonymized text:\n\t{anonymized_results.text}")
코드를 단일 클래스로 통합하고 이전에 식별된 추가 엔티티를 포함하도록 엔티티 목록을 확장해 보겠습니다.
from typing import ClassVar

from faker import Faker
from presidio_anonymizer import AnonymizerEngine
from presidio_anonymizer.entities import OperatorConfig

# A custom class for generating fake data that extends Faker
class MyFaker(Faker):
    # Create faker functions (note that it has to receive a value)
    def fake_address(self):
        return fake.address()

    def fake_ssn(self):
        return fake.ssn()

    def fake_name(self):
        return fake.name()

    def fake_number(self):
        return fake.phone_number()

    def fake_email(self):
        return fake.email()

    # Create custom operators for the entities
    operators: ClassVar[dict[str, OperatorConfig]] = {
        "PERSON": OperatorConfig("custom", {"lambda": fake_name}),
        "PHONE_NUMBER": OperatorConfig("custom", {"lambda": fake_number}),
        "EMAIL_ADDRESS": OperatorConfig("custom", {"lambda": fake_email}),
        "LOCATION": OperatorConfig("custom", {"lambda": fake_address}),
        "US_SSN": OperatorConfig("custom", {"lambda": fake_ssn}),
    }

    def redact_and_anonymize_with_faker(self, text):
        anonymizer = AnonymizerEngine()
        analyzer_results = analyzer.analyze(
            text=text,
            entities=["PHONE_NUMBER", "PERSON", "LOCATION", "EMAIL_ADDRESS", "US_SSN"],
            language="en",
        )
        anonymized_results = anonymizer.anonymize(
            text=text, analyzer_results=analyzer_results, operators=self.operators
        )
        return anonymized_results.text
샘플 텍스트로 함수를 테스트해 보겠습니다:
faker = MyFaker()
text_to_anonymize = (
    "My name is Raphael and I like to fish. My phone number is 212-555-5555"
)
anonymized_text = faker.redact_and_anonymize_with_faker(text_to_anonymize)

print(f"Raw text:\n\t{text_to_anonymize}")
print(f"Anonymized text:\n\t{anonymized_text}")

방법 4: 다음 사용 autopatch_settings

다음을 사용할 수 있습니다 autopatch_settings 지원되는 LLM 통합 중 하나 이상에 대해 초기화 중에 직접 PII 처리를 구성합니다. 이 방법의 장점은 다음과 같습니다:
  1. PII 처리 로직이 초기화 시 중앙 집중화되고 범위가 지정되어 분산된 사용자 정의 로직의 필요성이 줄어듭니다.
  2. PII 처리 워크플로우는 특정 통합에 대해 사용자 정의하거나 완전히 비활성화할 수 있습니다.
다음을 사용하려면 autopatch_settings PII 처리를 구성하려면, 다음을 정의하세요 postprocess_inputs 및/또는 postprocess_output 내의 op_settings 지원되는 LLM 통합 중 하나에 대해.

def postprocess(inputs: dict) -> dict:
    if "SENSITIVE_KEY" in inputs:
        inputs["SENSITIVE_KEY"] = "REDACTED"
    return inputs

client = weave.init(
    ...,
    autopatch_settings={
        "openai": {
            "op_settings": {
                "postprocess_inputs": postprocess,
                "postprocess_output": ...,
            }
        },
        "anthropic": {
            "op_settings": {
                "postprocess_inputs": ...,
                "postprocess_output": ...,
            }
        }
    },
)

Weave 호출에 방법 적용

다음 예제에서는 PII 수정 및 익명화 방법을 Weave Models에 통합하고 Weave Traces에서 결과를 미리 봅니다. 먼저, 다음을 생성합니다 Weave Model. Weave Model은 모델이 작동하는 방식을 정의하는 구성 설정, 모델 가중치 및 코드와 같은 정보의 조합입니다. 우리 모델에서는 Anthropic API가 호출될 predict 함수를 포함할 것입니다. Anthropic의 Claude Sonnet은 Traces를 사용하여 LLM 호출을 추적하면서 감정 분석을 수행하는 데 사용됩니다Traces. Claude Sonnet은 텍스트 블록을 받아 다음 감정 분류 중 하나를 출력합니다:positive, negative, 또는 neutral. 또한 PII 데이터가 LLM에 전송되기 전에 수정되거나 익명화되도록 후처리 함수도 포함할 것입니다. 이 코드를 실행하면 Weave 프로젝트 페이지와 실행한 특정 trace(LLM 호출)에 대한 링크를 받게 됩니다.

정규식 방법

가장 간단한 경우, 정규식을 사용하여 원본 텍스트에서 PII 데이터를 식별하고 수정할 수 있습니다.
import json
from typing import Any

import anthropic

import weave

# Define an input postprocessing function that applies our regex redaction for the model prediction Weave Op
def postprocess_inputs_regex(inputs: dict[str, Any]) -> dict:
    inputs["text_block"] = redact_with_regex(inputs["text_block"])
    return inputs

# Weave model / predict function
class SentimentAnalysisRegexPiiModel(weave.Model):
    model_name: str
    system_prompt: str
    temperature: int

    @weave.op(
        postprocess_inputs=postprocess_inputs_regex,
    )
    async def predict(self, text_block: str) -> dict:
        client = anthropic.AsyncAnthropic()
        response = await client.messages.create(
            max_tokens=1024,
            model=self.model_name,
            system=self.system_prompt,
            messages=[
                {"role": "user", "content": [{"type": "text", "text": text_block}]}
            ],
        )
        result = response.content[0].text
        if result is None:
            raise ValueError("No response from model")
        parsed = json.loads(result)
        return parsed
python
# create our LLM model with a system prompt
model = SentimentAnalysisRegexPiiModel(
    name="claude-3-sonnet",
    model_name="claude-3-5-sonnet-20240620",
    system_prompt='You are a Sentiment Analysis classifier. You will be classifying text based on their sentiment. Your input will be a block of text. You will answer with one the following rating option["positive", "negative", "neutral"]. Your answer should be one word in json format: {classification}. Ensure that it is valid JSON.',
    temperature=0,
)

print("Model: ", model)
# for every block of text, anonymized first and then predict
for entry in pii_data:
    await model.predict(entry["text"])

Presidio 수정 방법

다음으로, Presidio를 사용하여 원본 텍스트에서 PII 데이터를 식별하고 수정할 것입니다.
from typing import Any

import weave

# Define an input postprocessing function that applies our Presidio redaction for the model prediction Weave Op
def postprocess_inputs_presidio(inputs: dict[str, Any]) -> dict:
    inputs["text_block"] = redact_with_presidio(inputs["text_block"])
    return inputs

# Weave model / predict function
class SentimentAnalysisPresidioPiiModel(weave.Model):
    model_name: str
    system_prompt: str
    temperature: int

    @weave.op(
        postprocess_inputs=postprocess_inputs_presidio,
    )
    async def predict(self, text_block: str) -> dict:
        client = anthropic.AsyncAnthropic()
        response = await client.messages.create(
            max_tokens=1024,
            model=self.model_name,
            system=self.system_prompt,
            messages=[
                {"role": "user", "content": [{"type": "text", "text": text_block}]}
            ],
        )
        result = response.content[0].text
        if result is None:
            raise ValueError("No response from model")
        parsed = json.loads(result)
        return parsed
python
# create our LLM model with a system prompt
model = SentimentAnalysisPresidioPiiModel(
    name="claude-3-sonnet",
    model_name="claude-3-5-sonnet-20240620",
    system_prompt='You are a Sentiment Analysis classifier. You will be classifying text based on their sentiment. Your input will be a block of text. You will answer with one the following rating option["positive", "negative", "neutral"]. Your answer should be one word in json format: {classification}. Ensure that it is valid JSON.',
    temperature=0,
)

print("Model: ", model)
# for every block of text, anonymized first and then predict
for entry in pii_data:
    await model.predict(entry["text"])

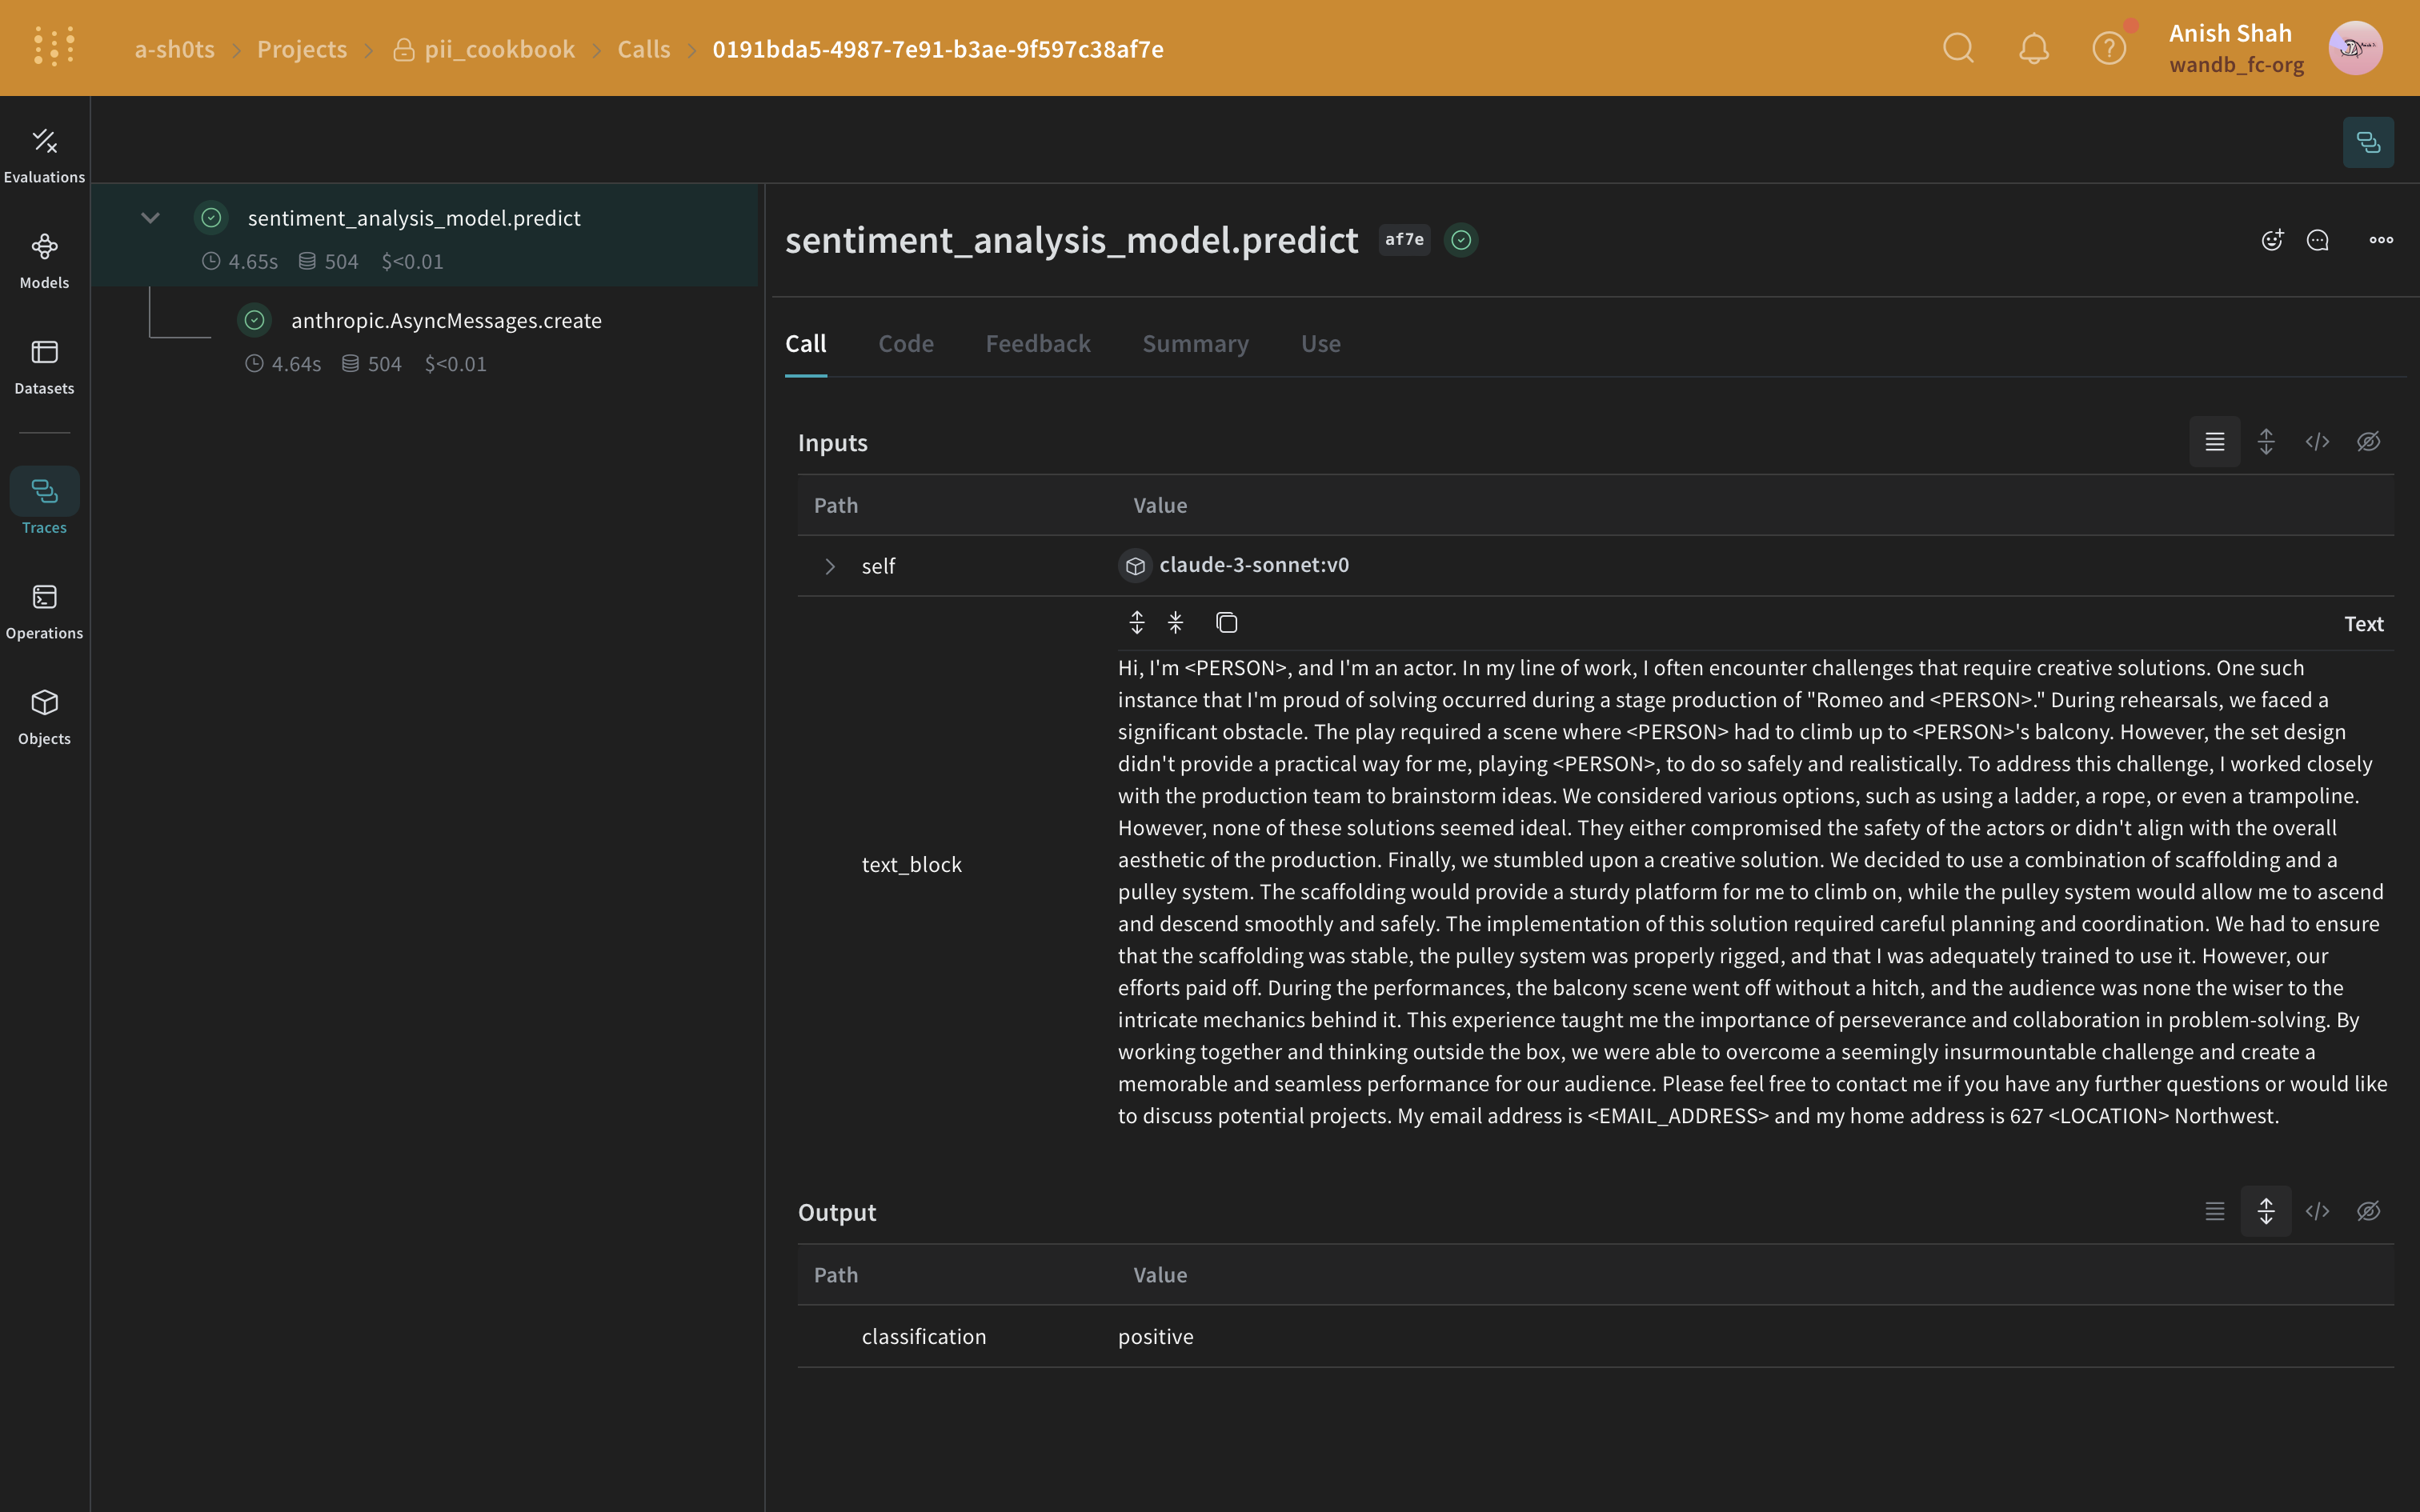
Faker 및 Presidio 대체 방법

이 예제에서는 Faker를 사용하여 익명화된 대체 PII 데이터를 생성하고 Presidio를 사용하여 원본 텍스트에서 PII 데이터를 식별하고 대체합니다.
from typing import Any

import weave

# Define an input postprocessing function that applies our Faker anonymization and Presidio redaction for the model prediction Weave Op
faker = MyFaker()

def postprocess_inputs_faker(inputs: dict[str, Any]) -> dict:
    inputs["text_block"] = faker.redact_and_anonymize_with_faker(inputs["text_block"])
    return inputs

# Weave model / predict function
class SentimentAnalysisFakerPiiModel(weave.Model):
    model_name: str
    system_prompt: str
    temperature: int

    @weave.op(
        postprocess_inputs=postprocess_inputs_faker,
    )
    async def predict(self, text_block: str) -> dict:
        client = anthropic.AsyncAnthropic()
        response = await client.messages.create(
            max_tokens=1024,
            model=self.model_name,
            system=self.system_prompt,
            messages=[
                {"role": "user", "content": [{"type": "text", "text": text_block}]}
            ],
        )
        result = response.content[0].text
        if result is None:
            raise ValueError("No response from model")
        parsed = json.loads(result)
        return parsed
python
# create our LLM model with a system prompt
model = SentimentAnalysisFakerPiiModel(
    name="claude-3-sonnet",
    model_name="claude-3-5-sonnet-20240620",
    system_prompt='You are a Sentiment Analysis classifier. You will be classifying text based on their sentiment. Your input will be a block of text. You will answer with one the following rating option["positive", "negative", "neutral"]. Your answer should be one word in json format: {classification}. Ensure that it is valid JSON.',
    temperature=0,
)

print("Model: ", model)
# for every block of text, anonymized first and then predict
for entry in pii_data:
    await model.predict(entry["text"])

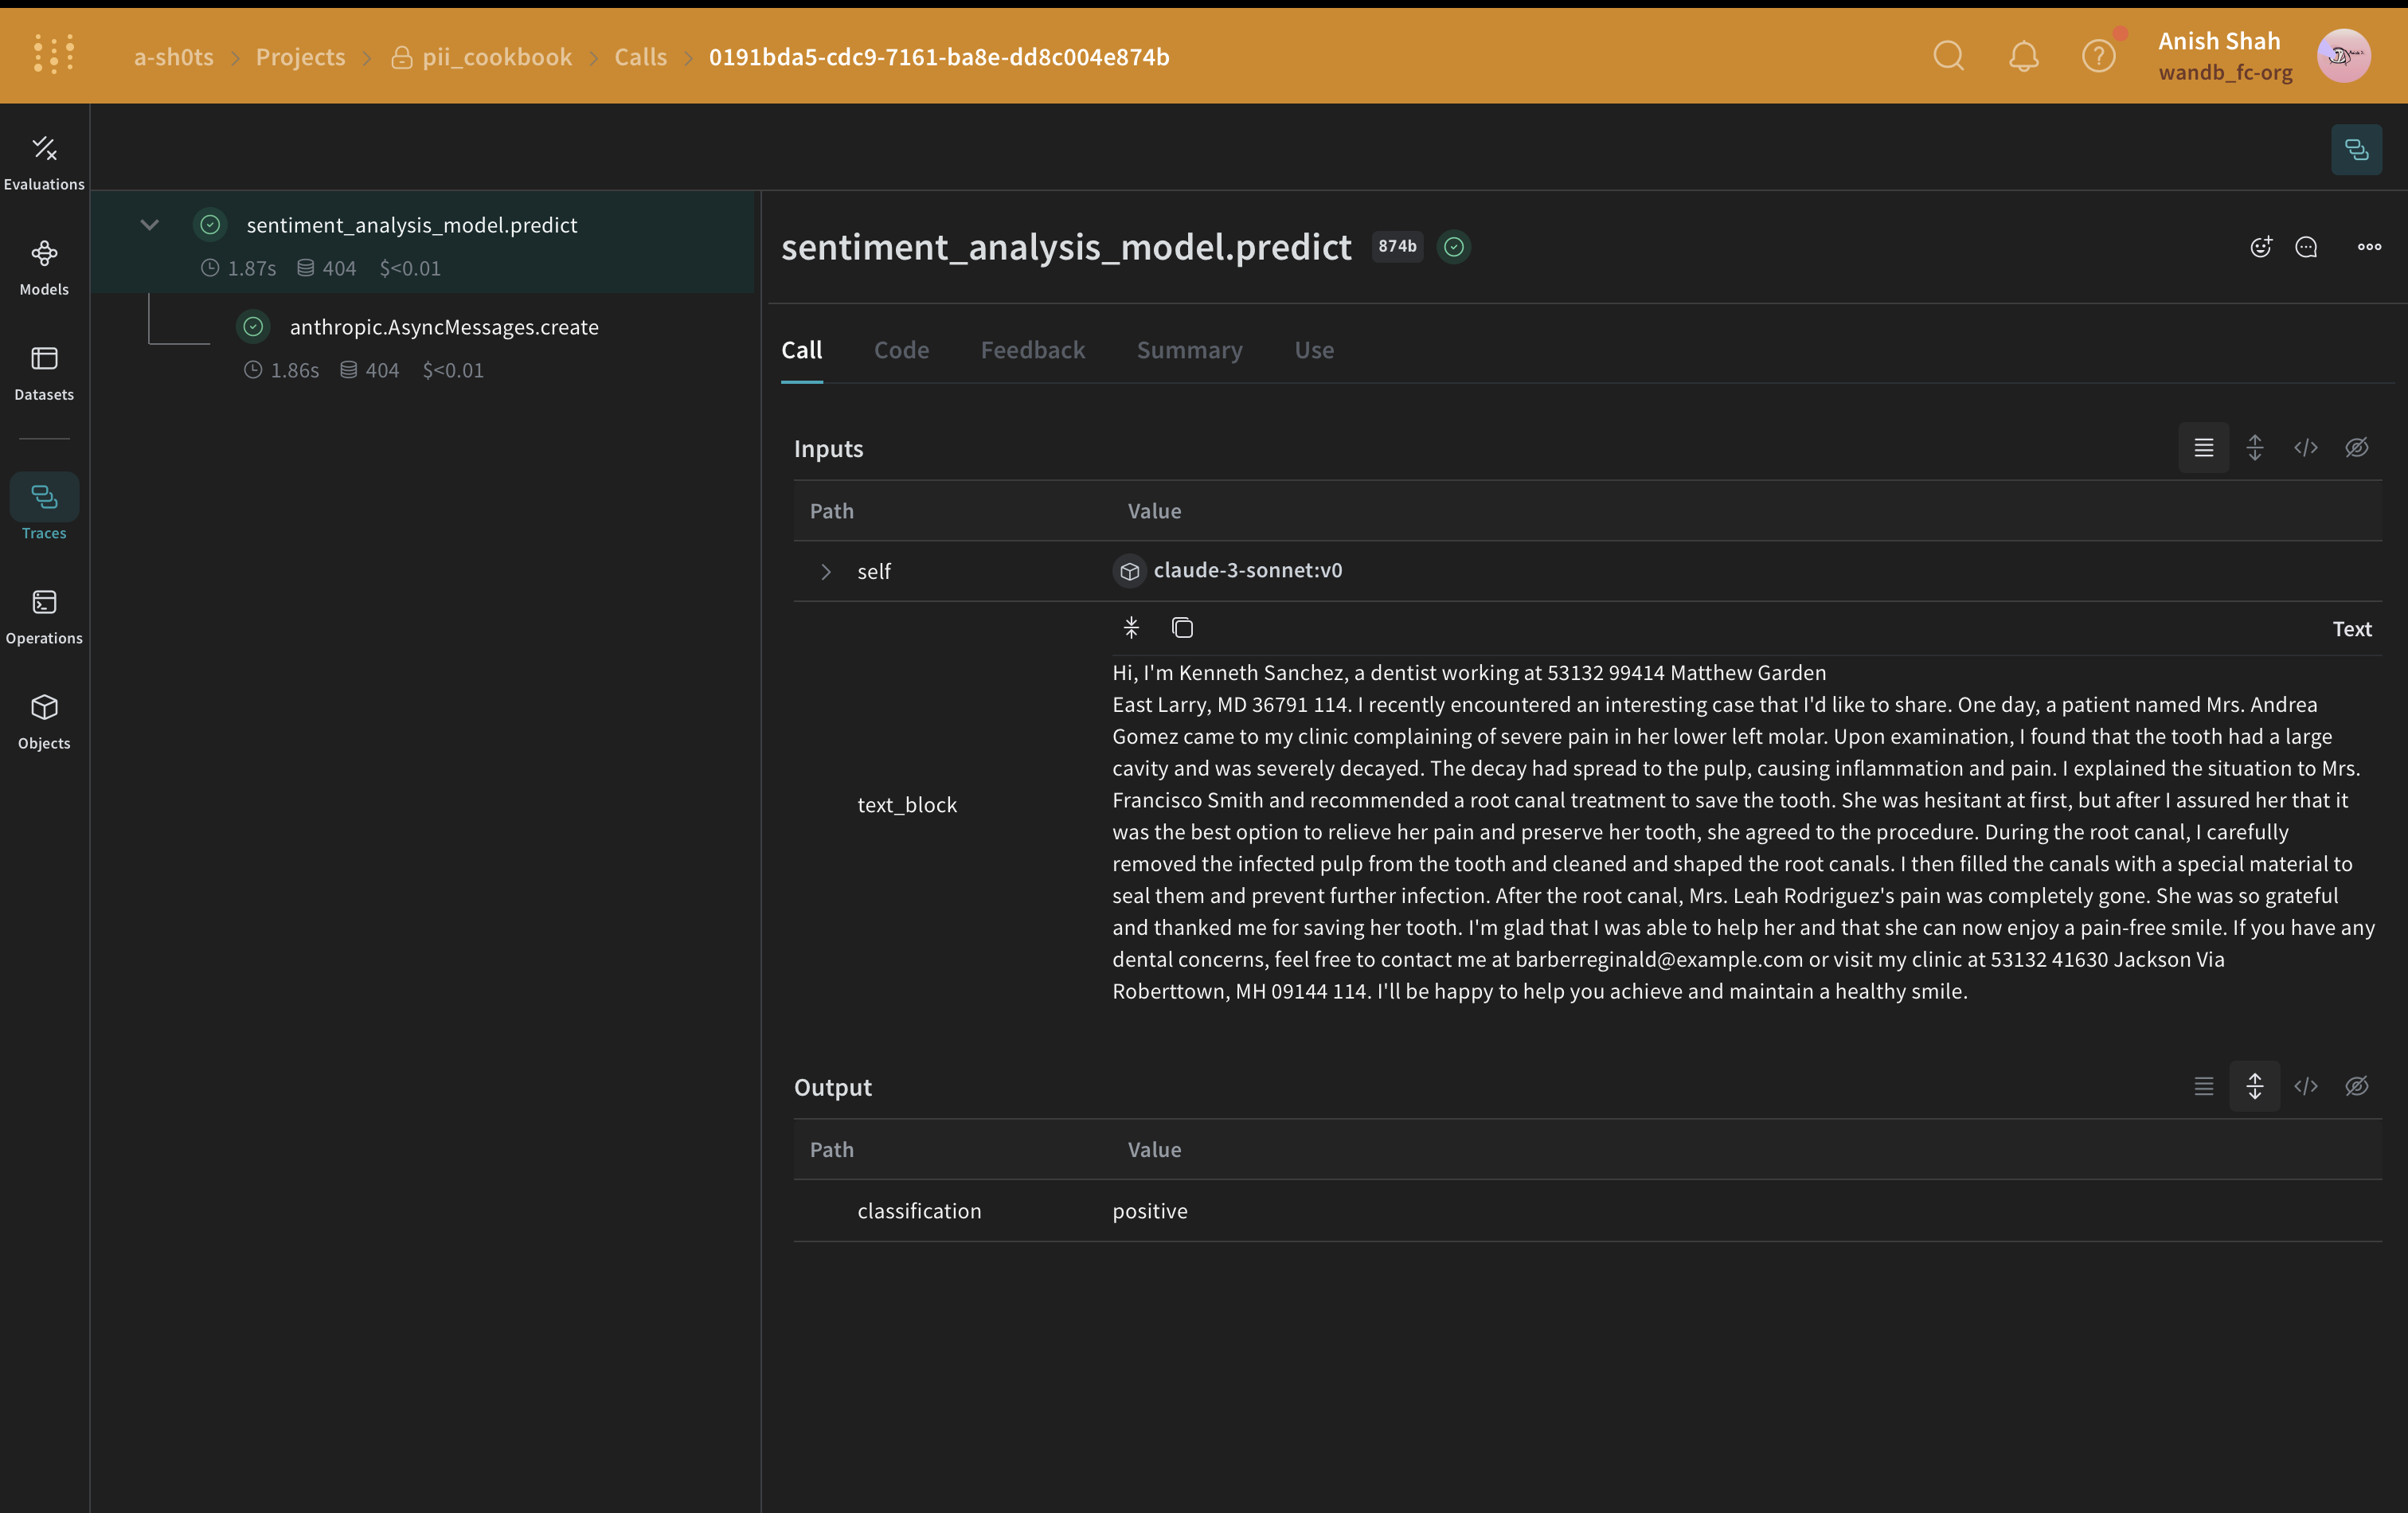
autopatch_settings 방법

다음 예제에서는 postprocess_inputs for anthropic to the postprocess_inputs_regex() function ()를 초기화 시 설정합니다. postprocess_inputs_regex function은redact_with_regex method를 적용합니다 방법 1: 정규 표현식 필터링. 이제, redact_with_regex은(는) 모든 anthropic 모델의 입력에 적용됩니다.
from typing import Any

import weave

client = weave.init(
    ...,
    autopatch_settings={
        "anthropic": {
            "op_settings": {
                "postprocess_inputs": postprocess_inputs_regex,
            }
        }
    },
)

# Define an input postprocessing function that applies our regex redaction for the model prediction Weave Op
def postprocess_inputs_regex(inputs: dict[str, Any]) -> dict:
    inputs["text_block"] = redact_with_regex(inputs["text_block"])
    return inputs

# Weave model / predict function
class SentimentAnalysisRegexPiiModel(weave.Model):
    model_name: str
    system_prompt: str
    temperature: int

    async def predict(self, text_block: str) -> dict:
        client = anthropic.AsyncAnthropic()
        response = await client.messages.create(
            max_tokens=1024,
            model=self.model_name,
            system=self.system_prompt,
            messages=[
                {"role": "user", "content": [{"type": "text", "text": text_block}]}
            ],
        )
        result = response.content[0].text
        if result is None:
            raise ValueError("No response from model")
        parsed = json.loads(result)
        return parsed
python
# create our LLM model with a system prompt
model = SentimentAnalysisRegexPiiModel(
    name="claude-3-sonnet",
    model_name="claude-3-5-sonnet-20240620",
    system_prompt='You are a Sentiment Analysis classifier. You will be classifying text based on their sentiment. Your input will be a block of text. You will answer with one the following rating option["positive", "negative", "neutral"]. Your answer should be one word in json format: {classification}. Ensure that it is valid JSON.',
    temperature=0,
)

print("Model: ", model)
# for every block of text, anonymized first and then predict
for entry in pii_data:
    await model.predict(entry["text"])

(선택 사항) 데이터 암호화

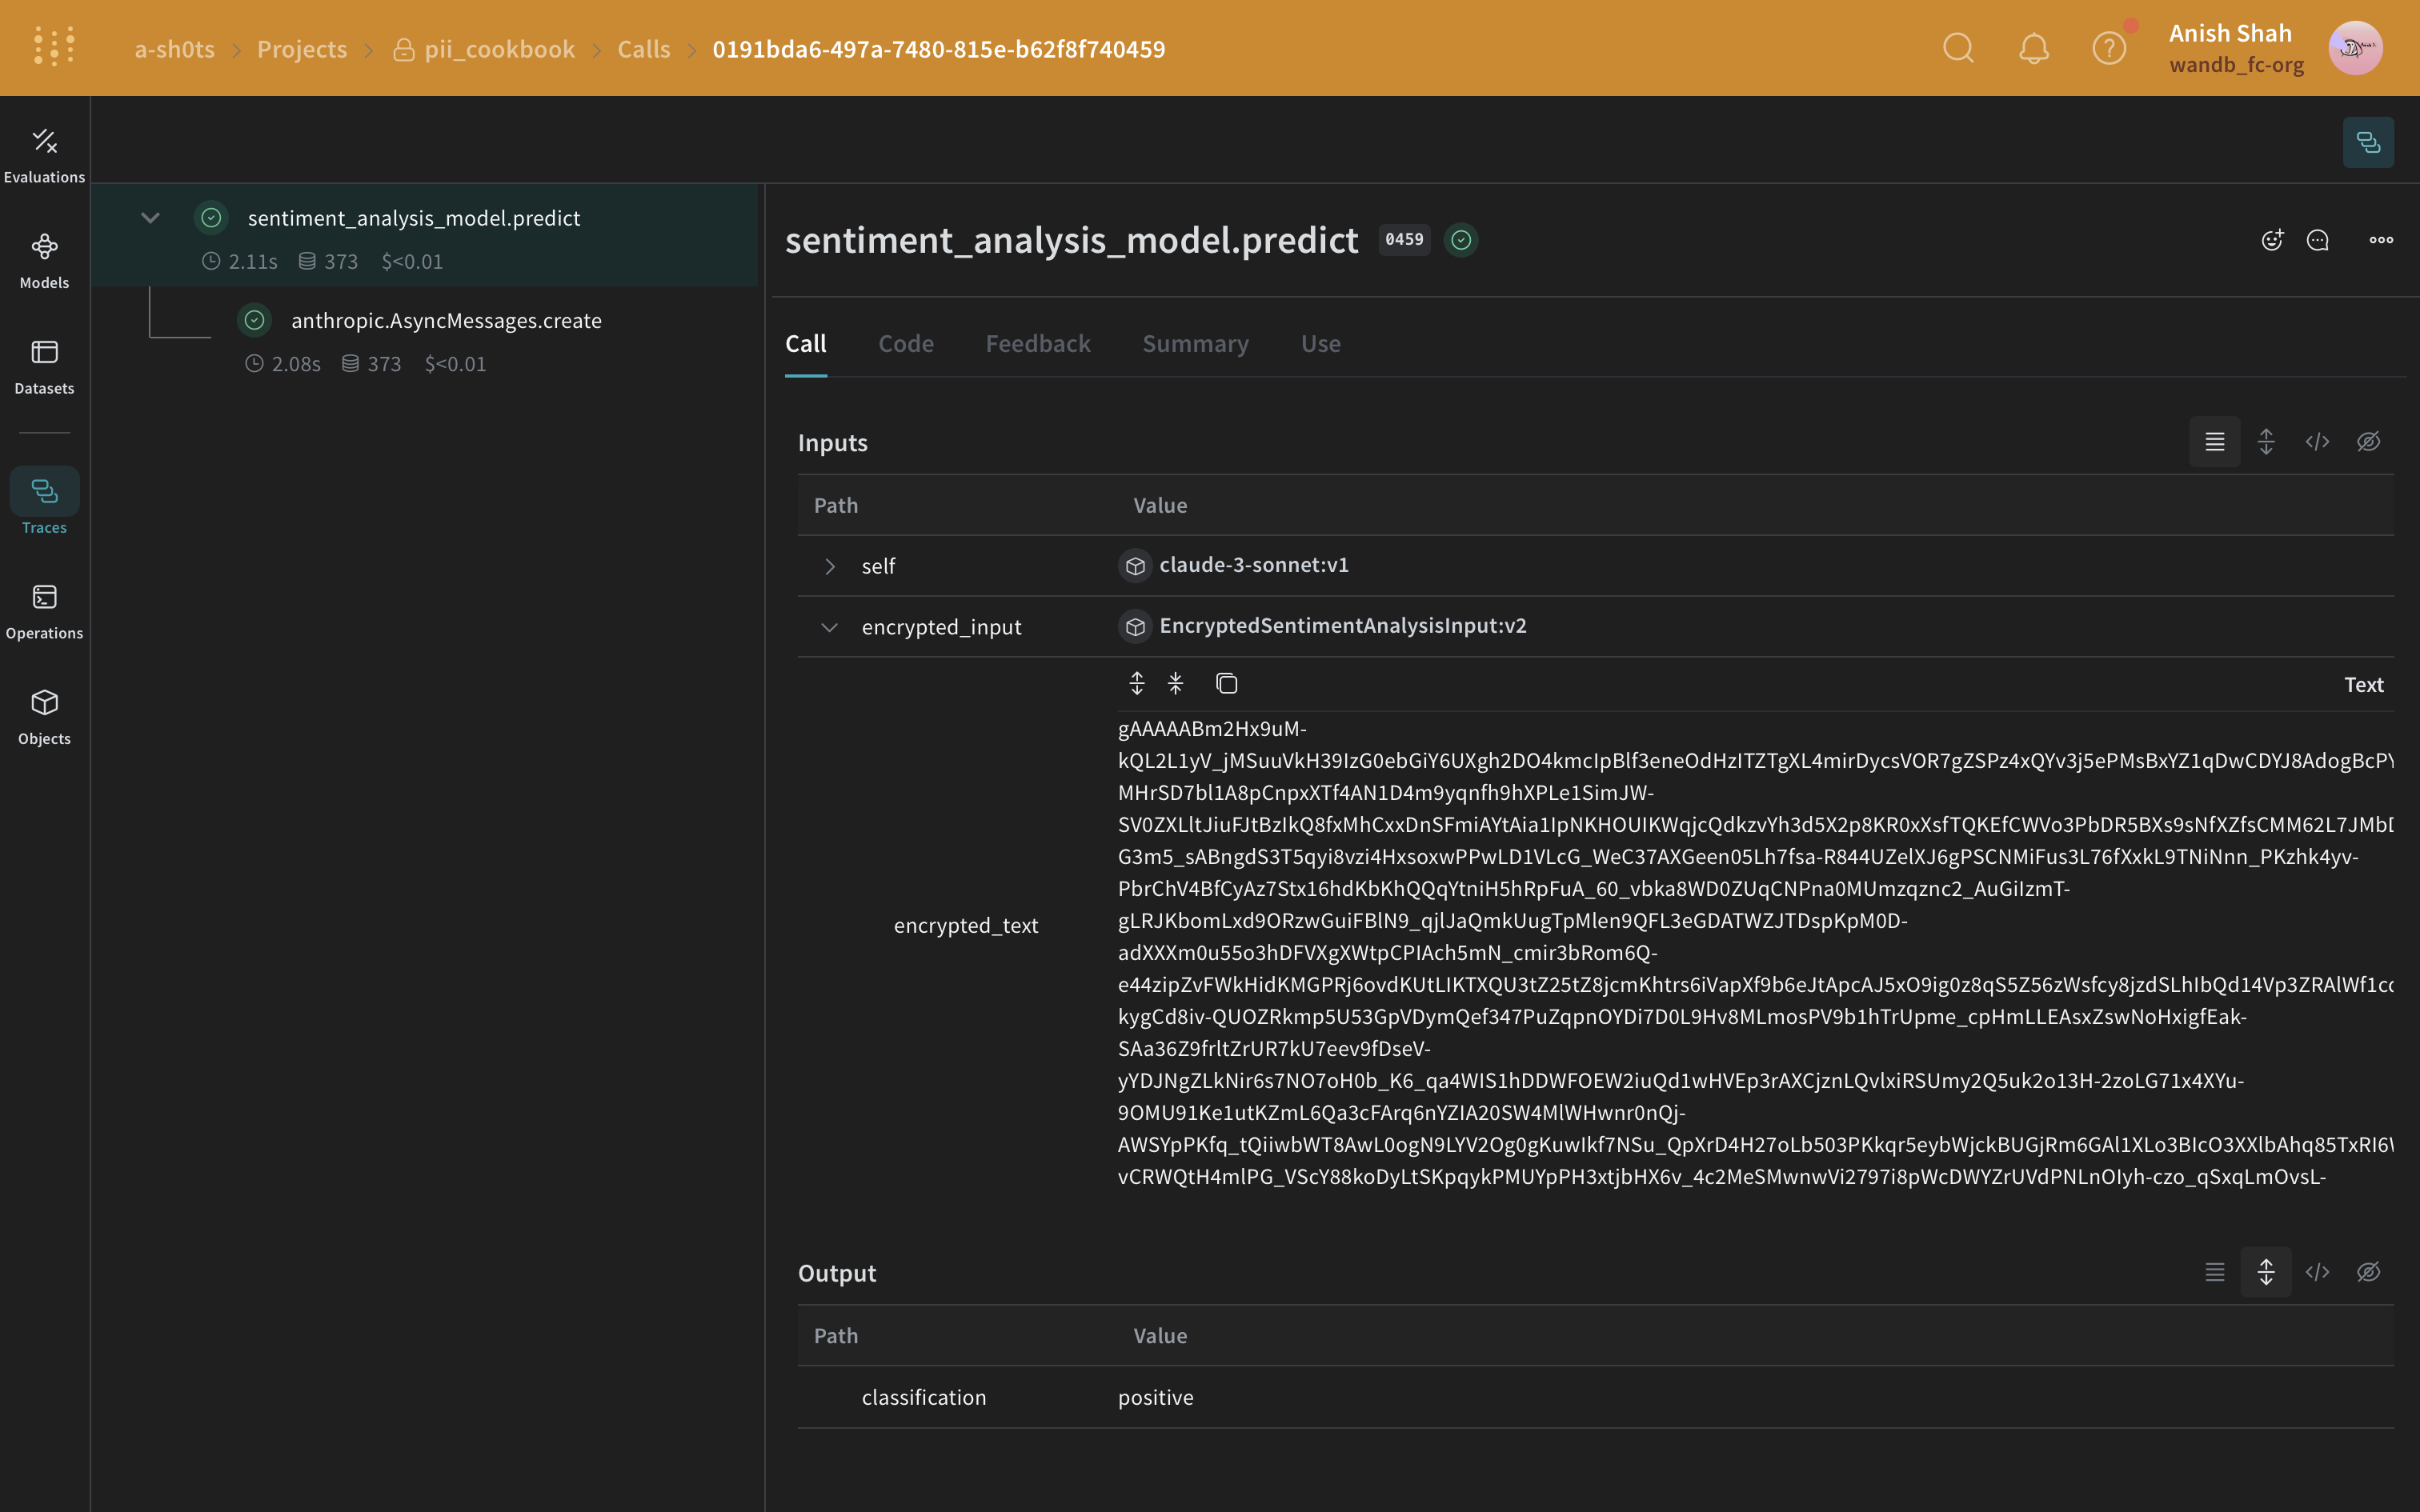
PII 익명화 외에도 cryptography 라이브러리의 Fernet 대칭 암호화를 사용하여 데이터에 추가 보안 계층을 추가할 수 있습니다. 이 접근 방식은 익명화된 데이터가 가로채어도 암호화 키 없이는 읽을 수 없도록 보장합니다.
import os
from cryptography.fernet import Fernet
from pydantic import BaseModel, ValidationInfo, model_validator

def get_fernet_key():
    # Check if the key exists in environment variables
    key = os.environ.get('FERNET_KEY')

    if key is None:
        # If the key doesn't exist, generate a new one
        key = Fernet.generate_key()
        # Save the key to an environment variable
        os.environ['FERNET_KEY'] = key.decode()
    else:
        # If the key exists, ensure it's in bytes
        key = key.encode()

    return key

cipher_suite = Fernet(get_fernet_key())

class EncryptedSentimentAnalysisInput(BaseModel):
    encrypted_text: str = None

    @model_validator(mode="before")
    def encrypt_fields(cls, values):
        if "text" in values and values["text"] is not None:
            values["encrypted_text"] = cipher_suite.encrypt(values["text"].encode()).decode()
            del values["text"]
        return values

    @property
    def text(self):
        if self.encrypted_text:
            return cipher_suite.decrypt(self.encrypted_text.encode()).decode()
        return None

    @text.setter
    def text(self, value):
        self.encrypted_text = cipher_suite.encrypt(str(value).encode()).decode()

    @classmethod
    def encrypt(cls, text: str):
        return cls(text=text)

    def decrypt(self):
        return self.text

# Modified sentiment_analysis_model to use the new EncryptedSentimentAnalysisInput
class sentiment_analysis_model(weave.Model):
    model_name: str
    system_prompt: str
    temperature: int

    @weave.op()
    async def predict(self, encrypted_input: EncryptedSentimentAnalysisInput) -> dict:
        client = AsyncAnthropic()

        decrypted_text = encrypted_input.decrypt() # We use the custom class to decrypt the text

        response = await client.messages.create(
            max_tokens=1024,
            model=self.model_name,
            system=self.system_prompt,
            messages=[
                {   "role": "user",
                    "content":[
                        {
                            "type": "text",
                            "text": decrypted_text
                        }
                    ]
                }
            ]
        )
        result = response.content[0].text
        if result is None:
            raise ValueError("No response from model")
        parsed = json.loads(result)
        return parsed

model = sentiment_analysis_model(
    name="claude-3-sonnet",
    model_name="claude-3-5-sonnet-20240620",
    system_prompt="You are a Sentiment Analysis classifier. You will be classifying text based on their sentiment. Your input will be a block of text. You will answer with one the following rating option[\"positive\", \"negative\", \"neutral\"]. Your answer should one word in json format dict where the key is classification.",
    temperature=0
)

for entry in pii_data:
    encrypted_input = EncryptedSentimentAnalysisInput.encrypt(entry["text"])
    await model.predict(encrypted_input)